

.svg?format=pjpg&auto=webp)
.svg?format=pjpg&auto=webp)
.png?format=pjpg&auto=webp)


.png?format=pjpg&auto=webp)
Automatic Asset Assignment to Entries with Automate
When doing ecommerce with Contentstack it is in general best practice to keep product data and images in the ecommerce platform but sometimes you want to keep some of it in Contentstack and this guide talks about a specific use case around images.
The core idea is to read filenames of uploaded assets and according to known heuristics extract identifiers that can be used to find matching entries and then linking the assets to the entries with Content Management API calls. An example of such a pattern would be:
- 12323123_1.jpg
- 12323123_2.jpg
- 12323123_3.jpg
- 12323123_4.jpg
Which would result in those four assets being linked to product_id 12323123 and ordered by the latter number (1-4).
Once all assets for a product are uploaded a sync script in the products entry sidebar should be triggered that fetches all the assets and links them to the entry.
One important note is that this process should not be triggered every time an asset is uploaded since that will result in parallel sync operations and lead to out of sync data.
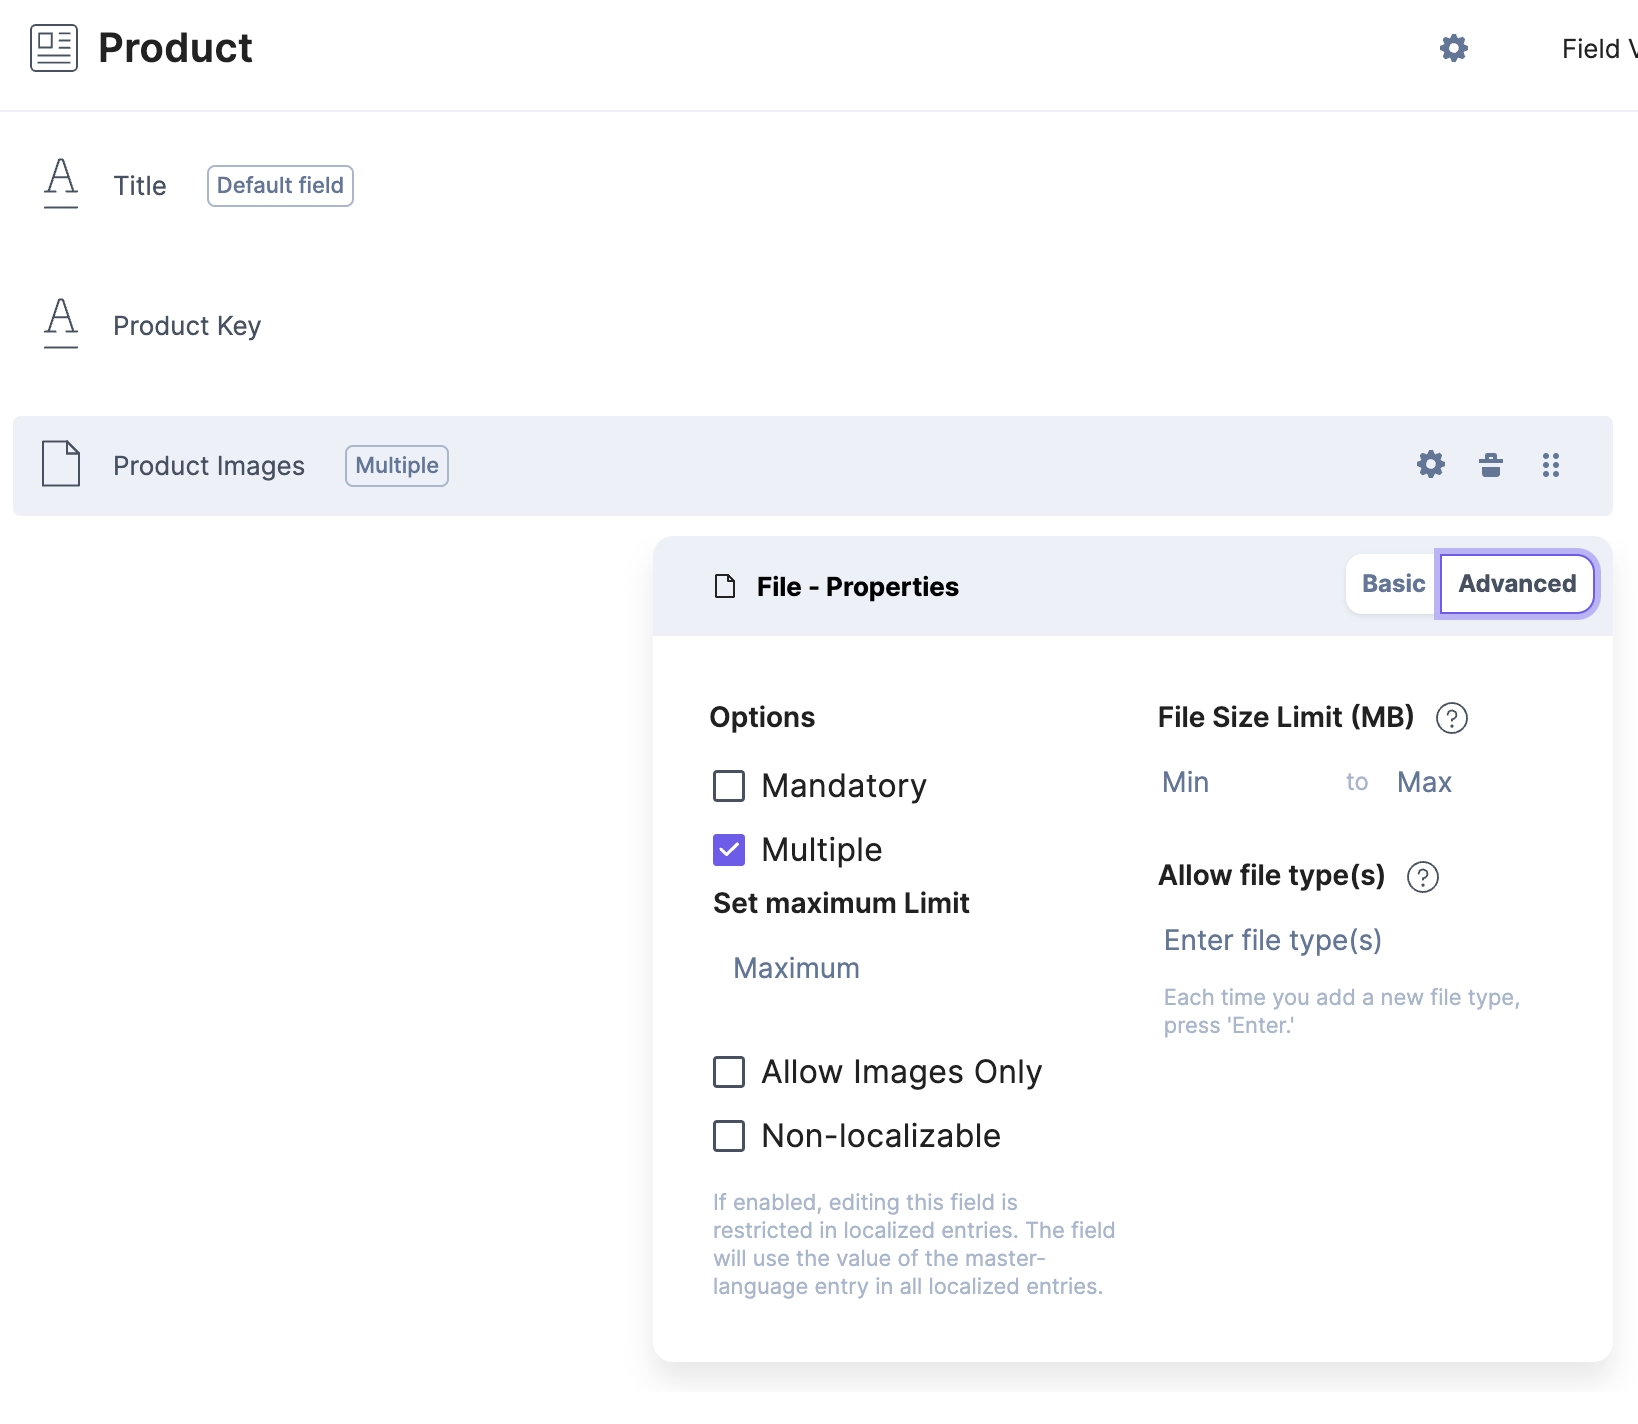
Initial Setup
Create a content type called Product with the following fields:
- A Single Line Text field called Product Key.
- A File field called Product Images (UID: product_images) and allow multiple files.
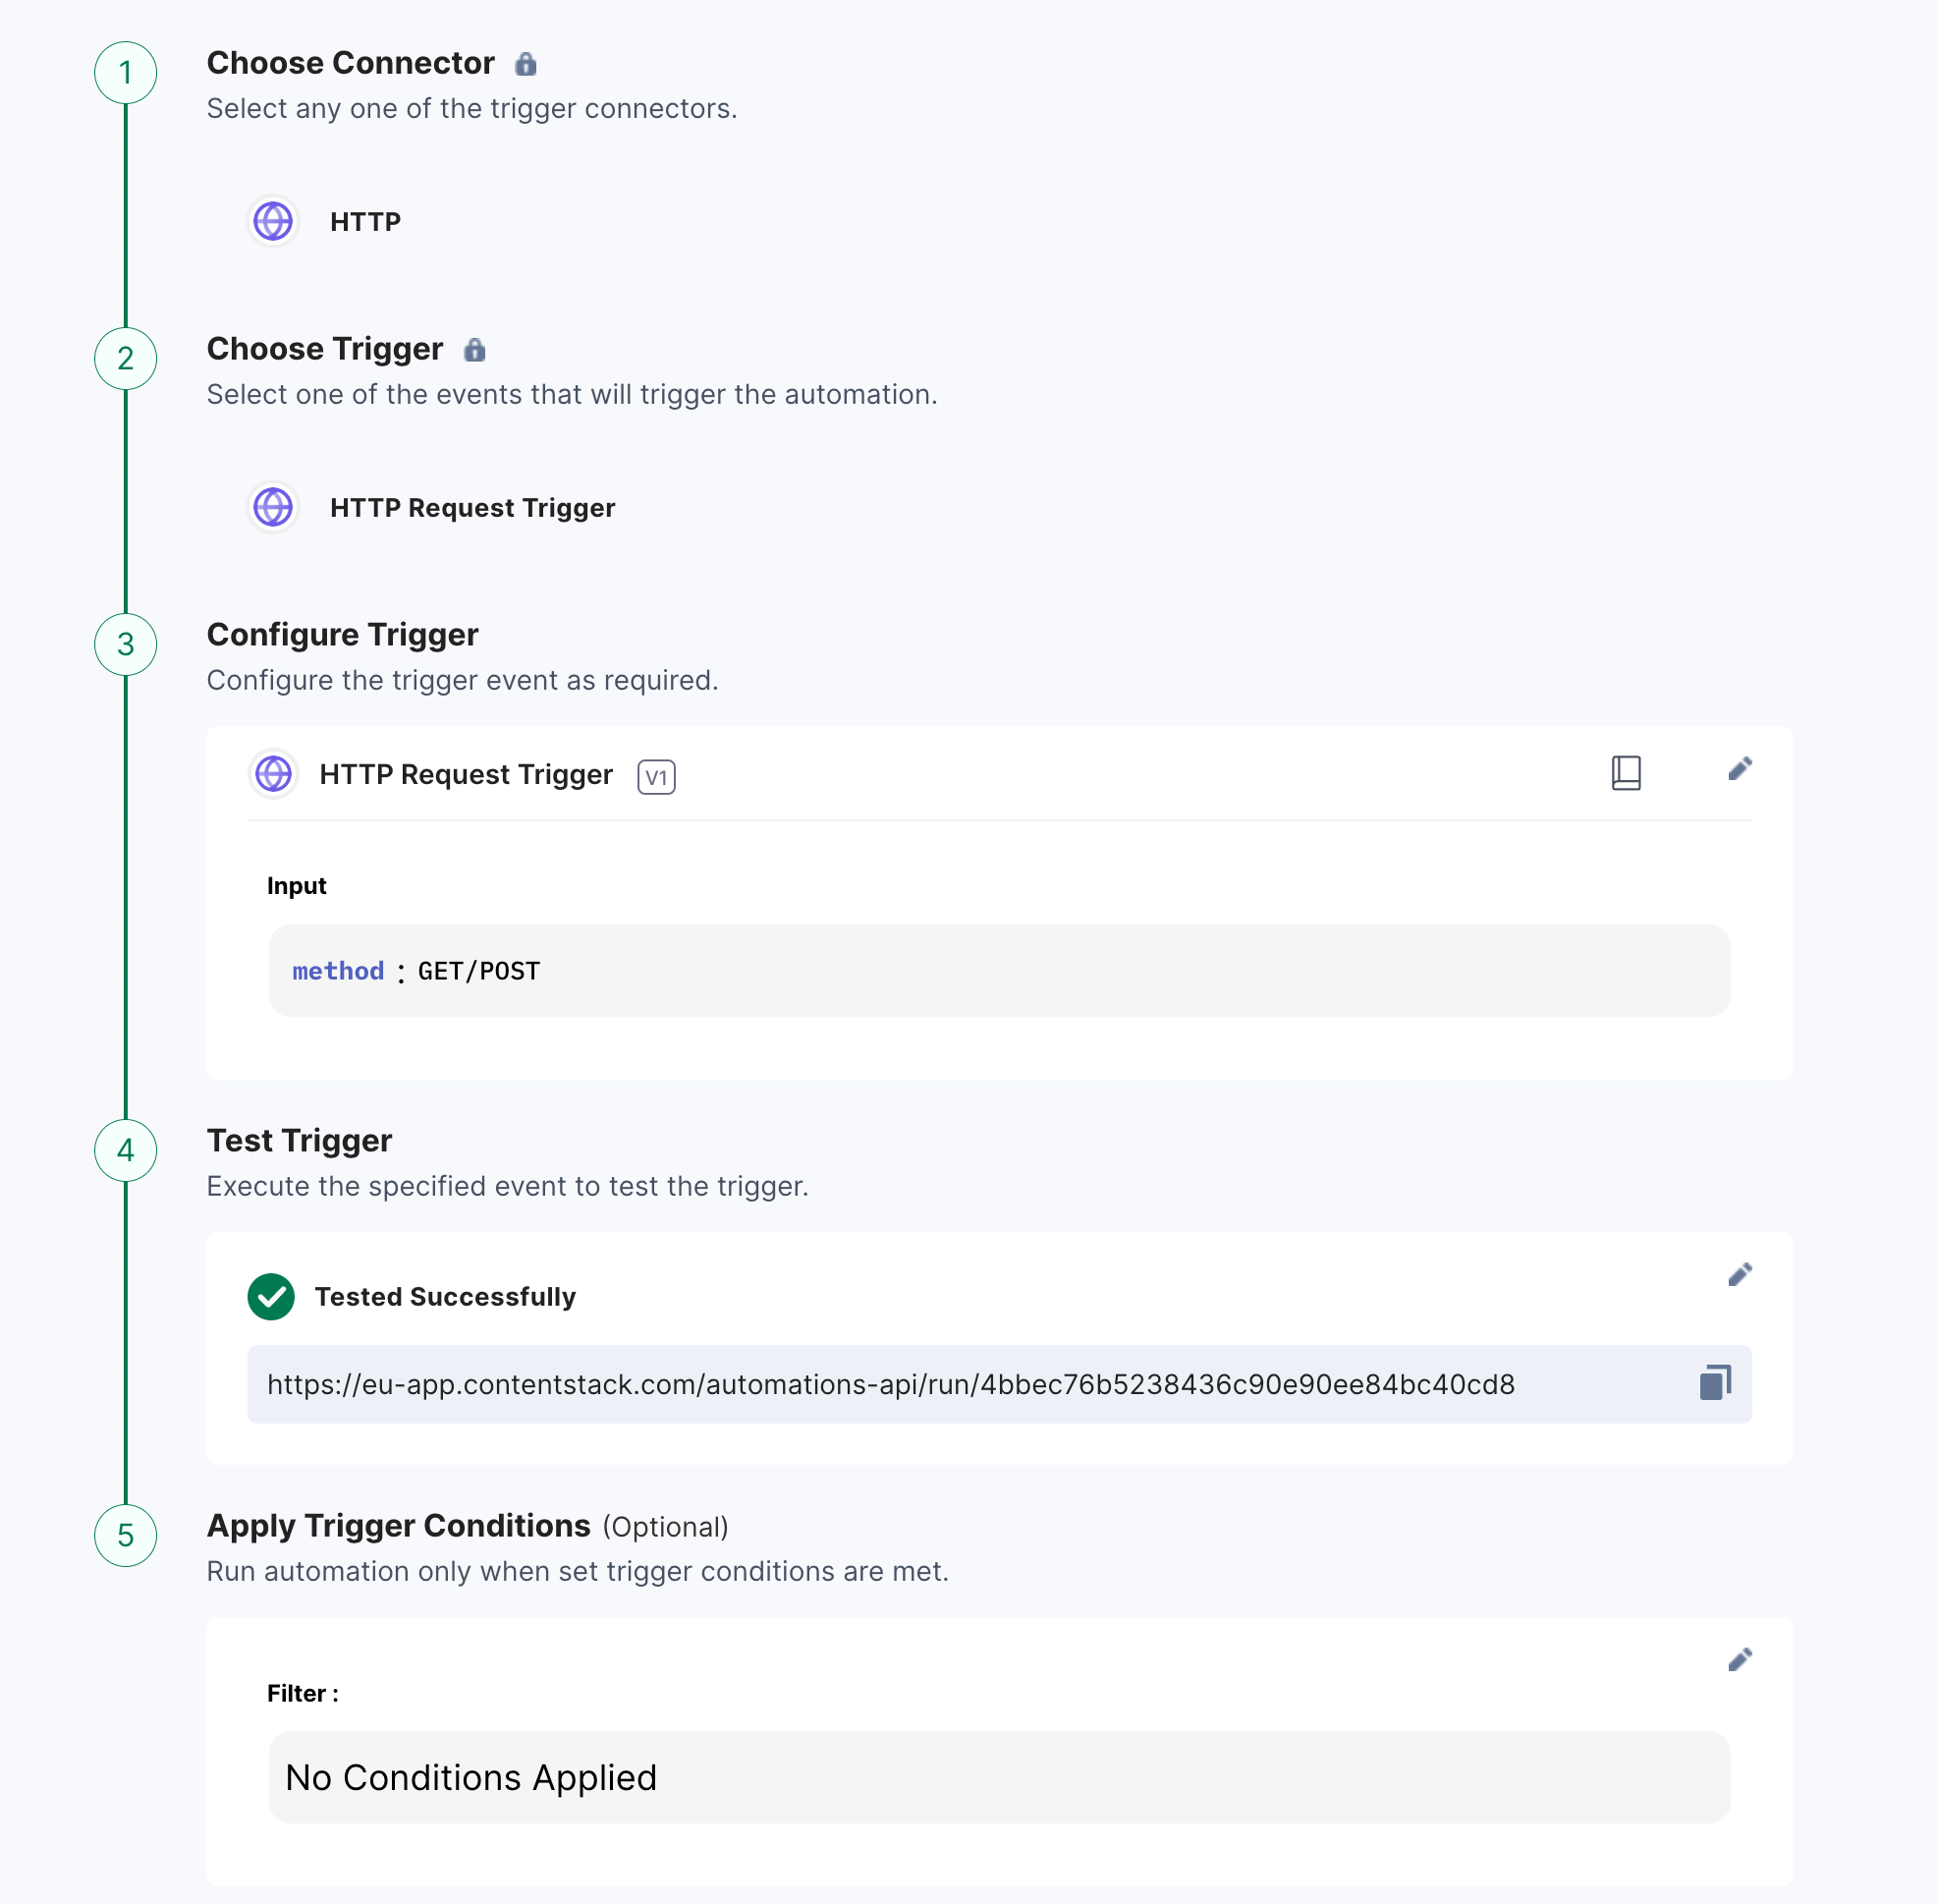
Building the Automation
Set the Trigger
The trigger is a simple HTTP trigger, when testing it you should have a product_key query parameter so the autocomplete in step 2 can pick it up.
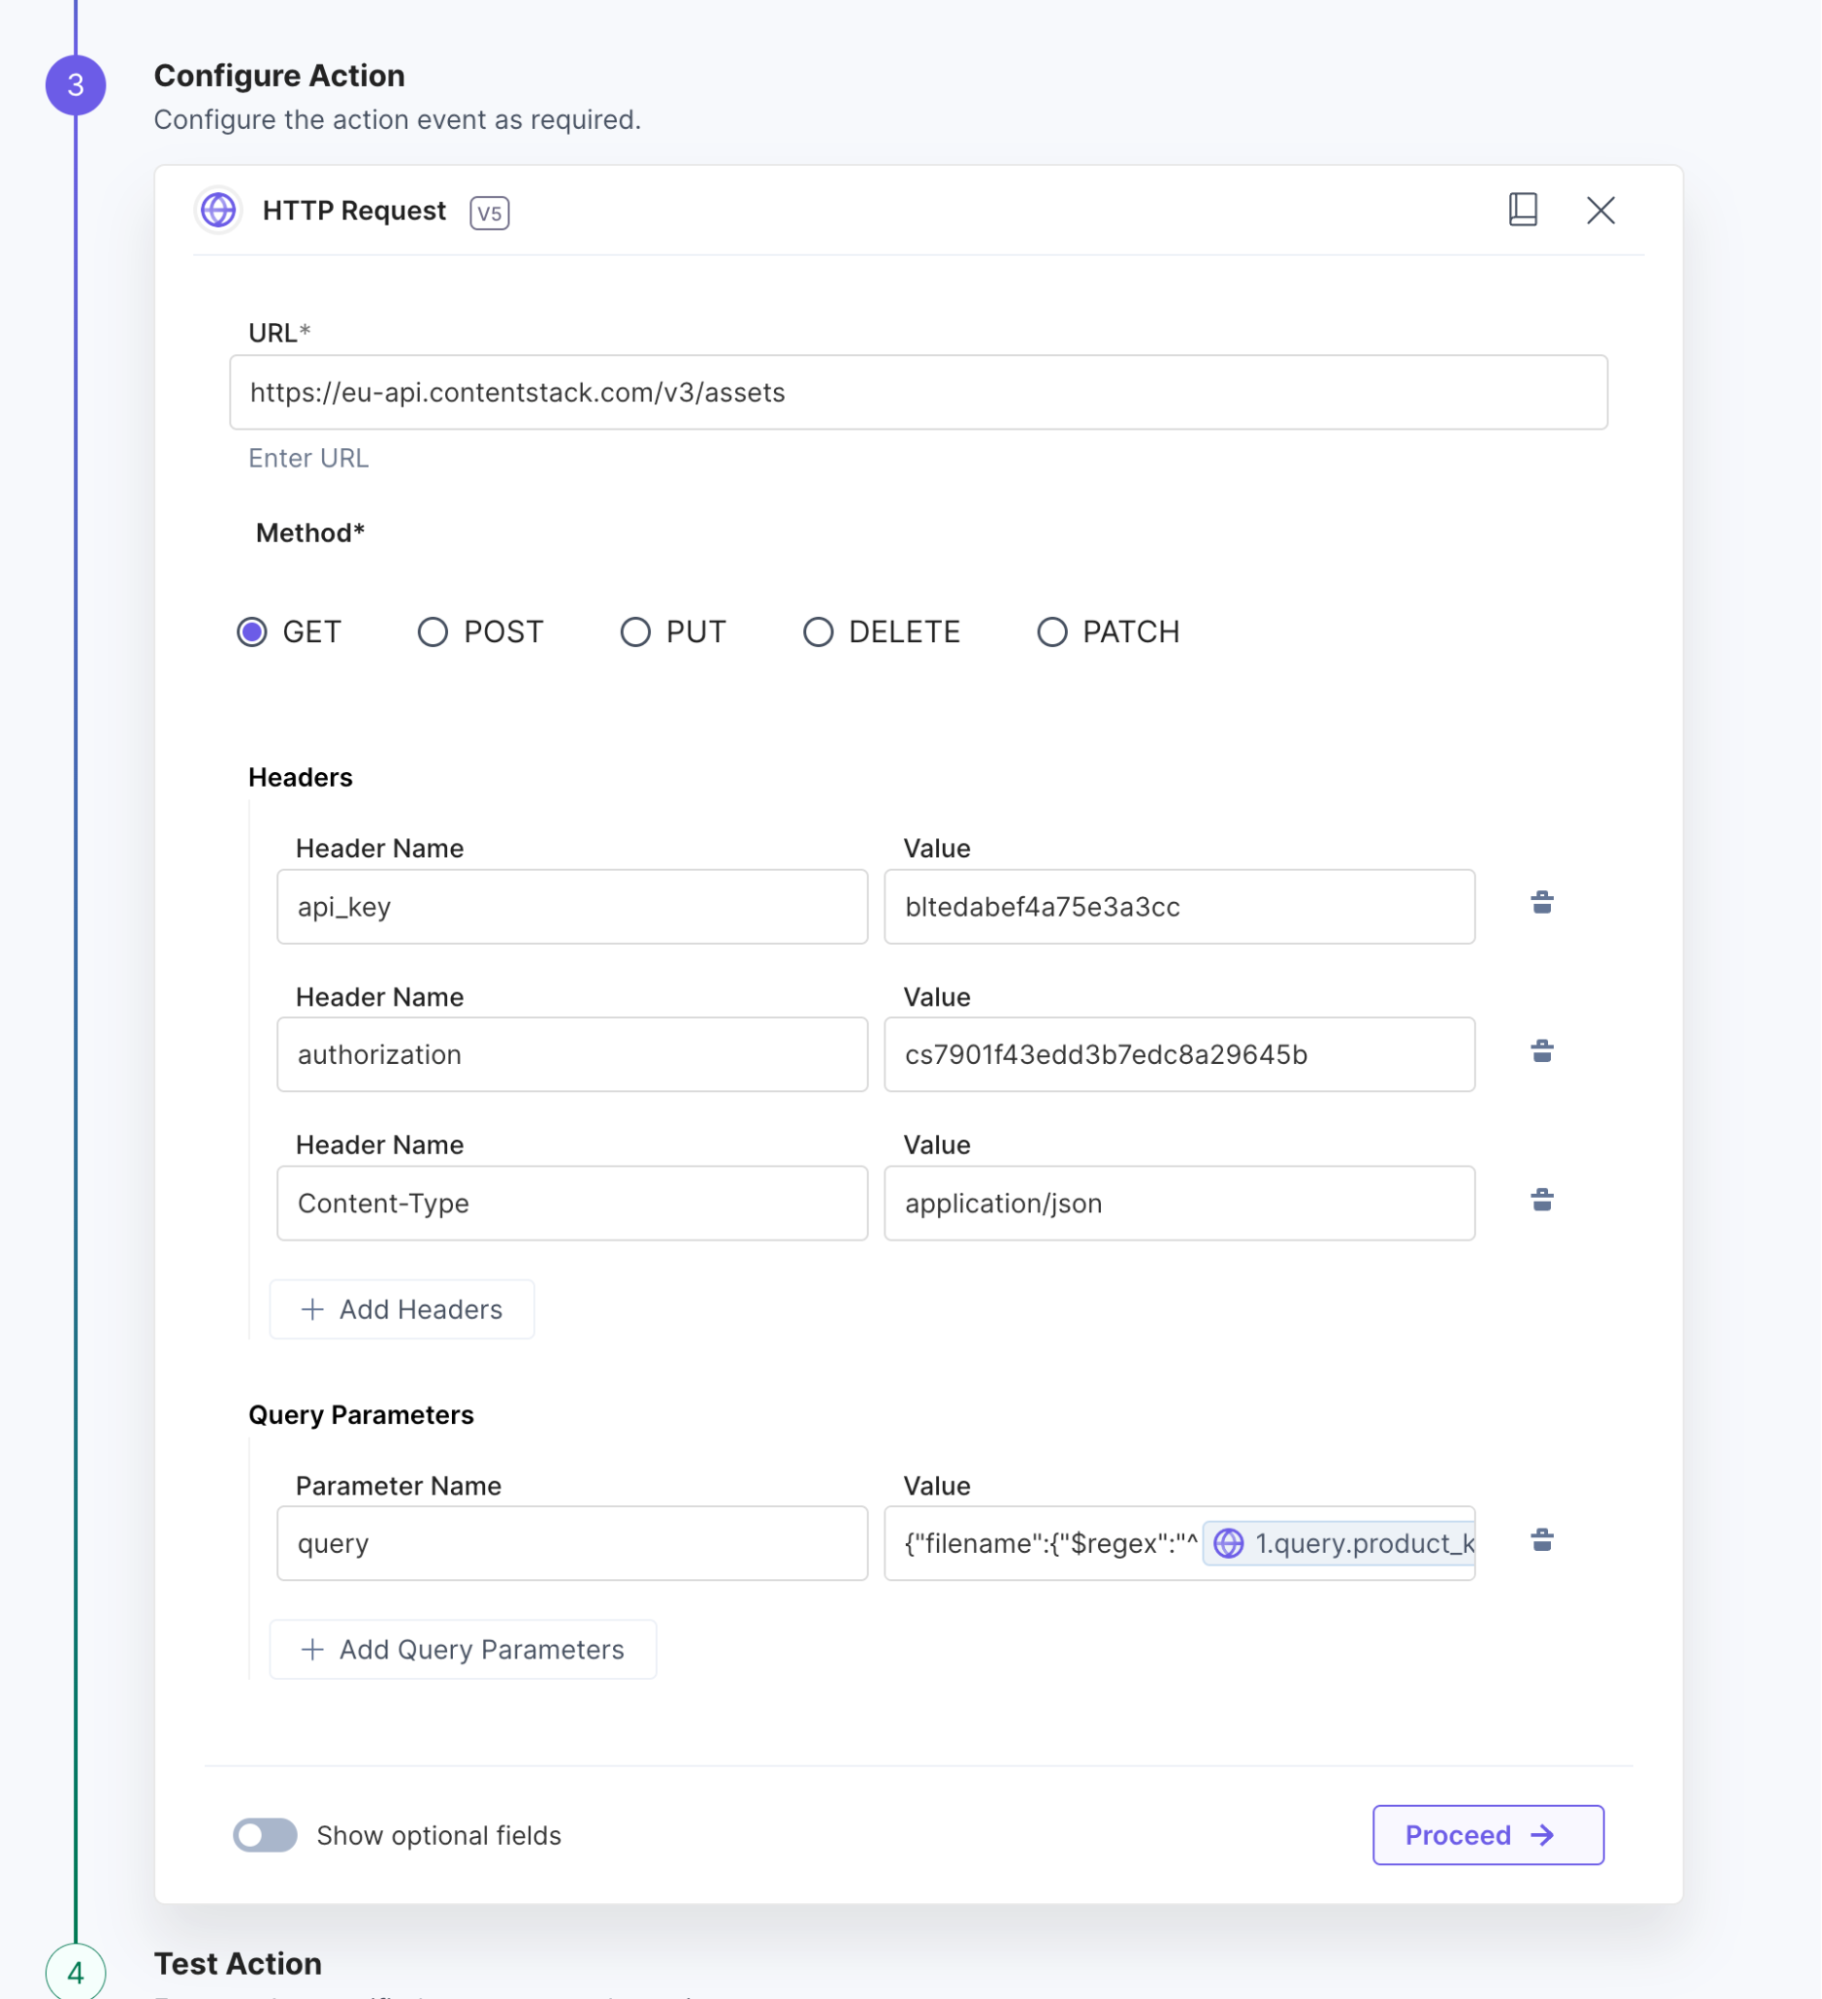
Fetch assets with the given product key
In step 2 we fetch all the assets with the product key we got in the query parameter in step 1. This is a straightforward CMA call with regex search in the filename. This returns a list of assets.
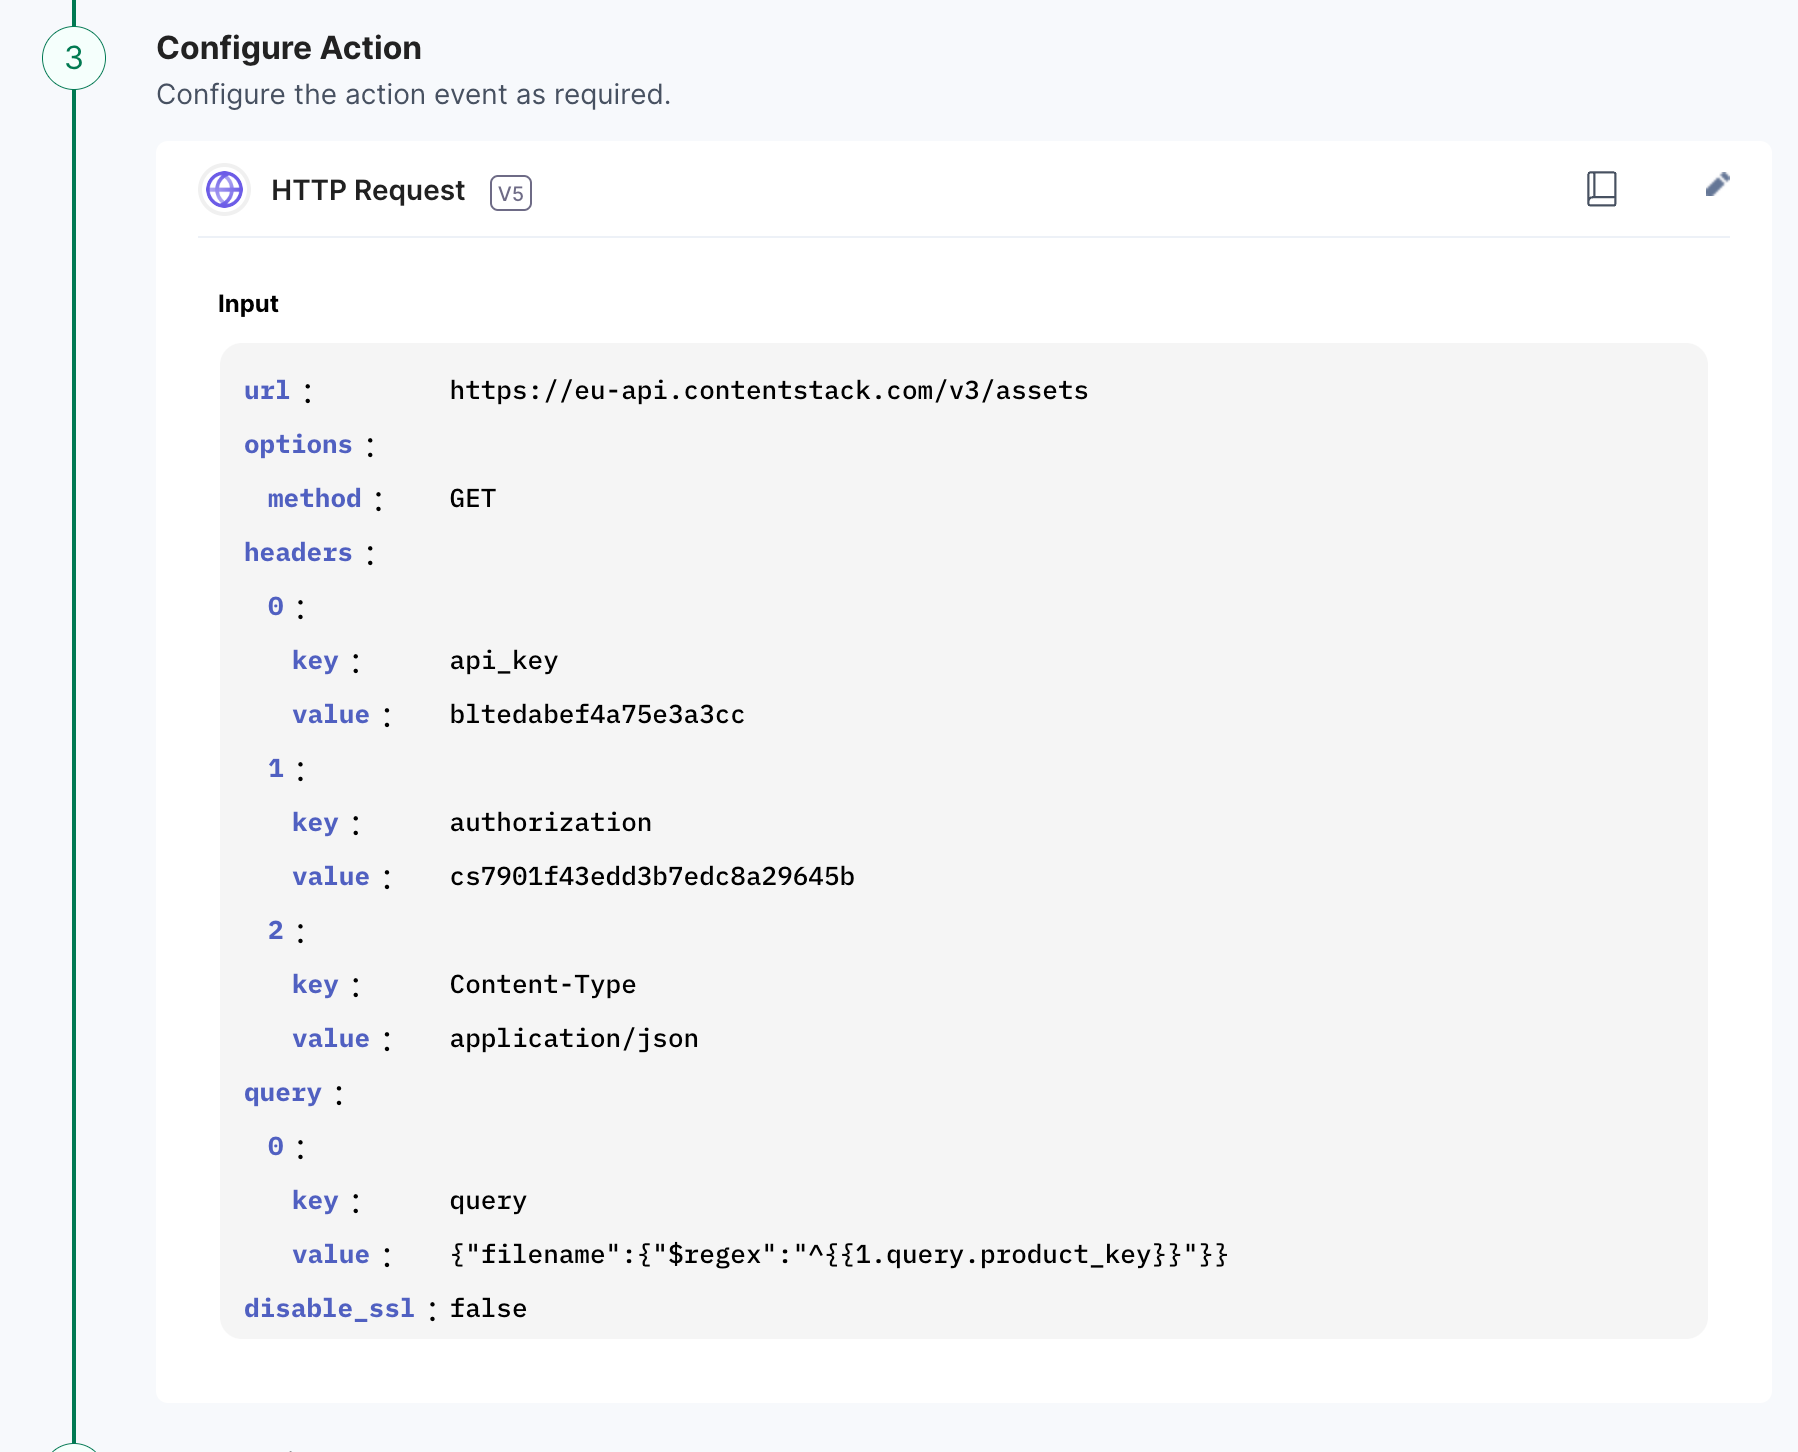
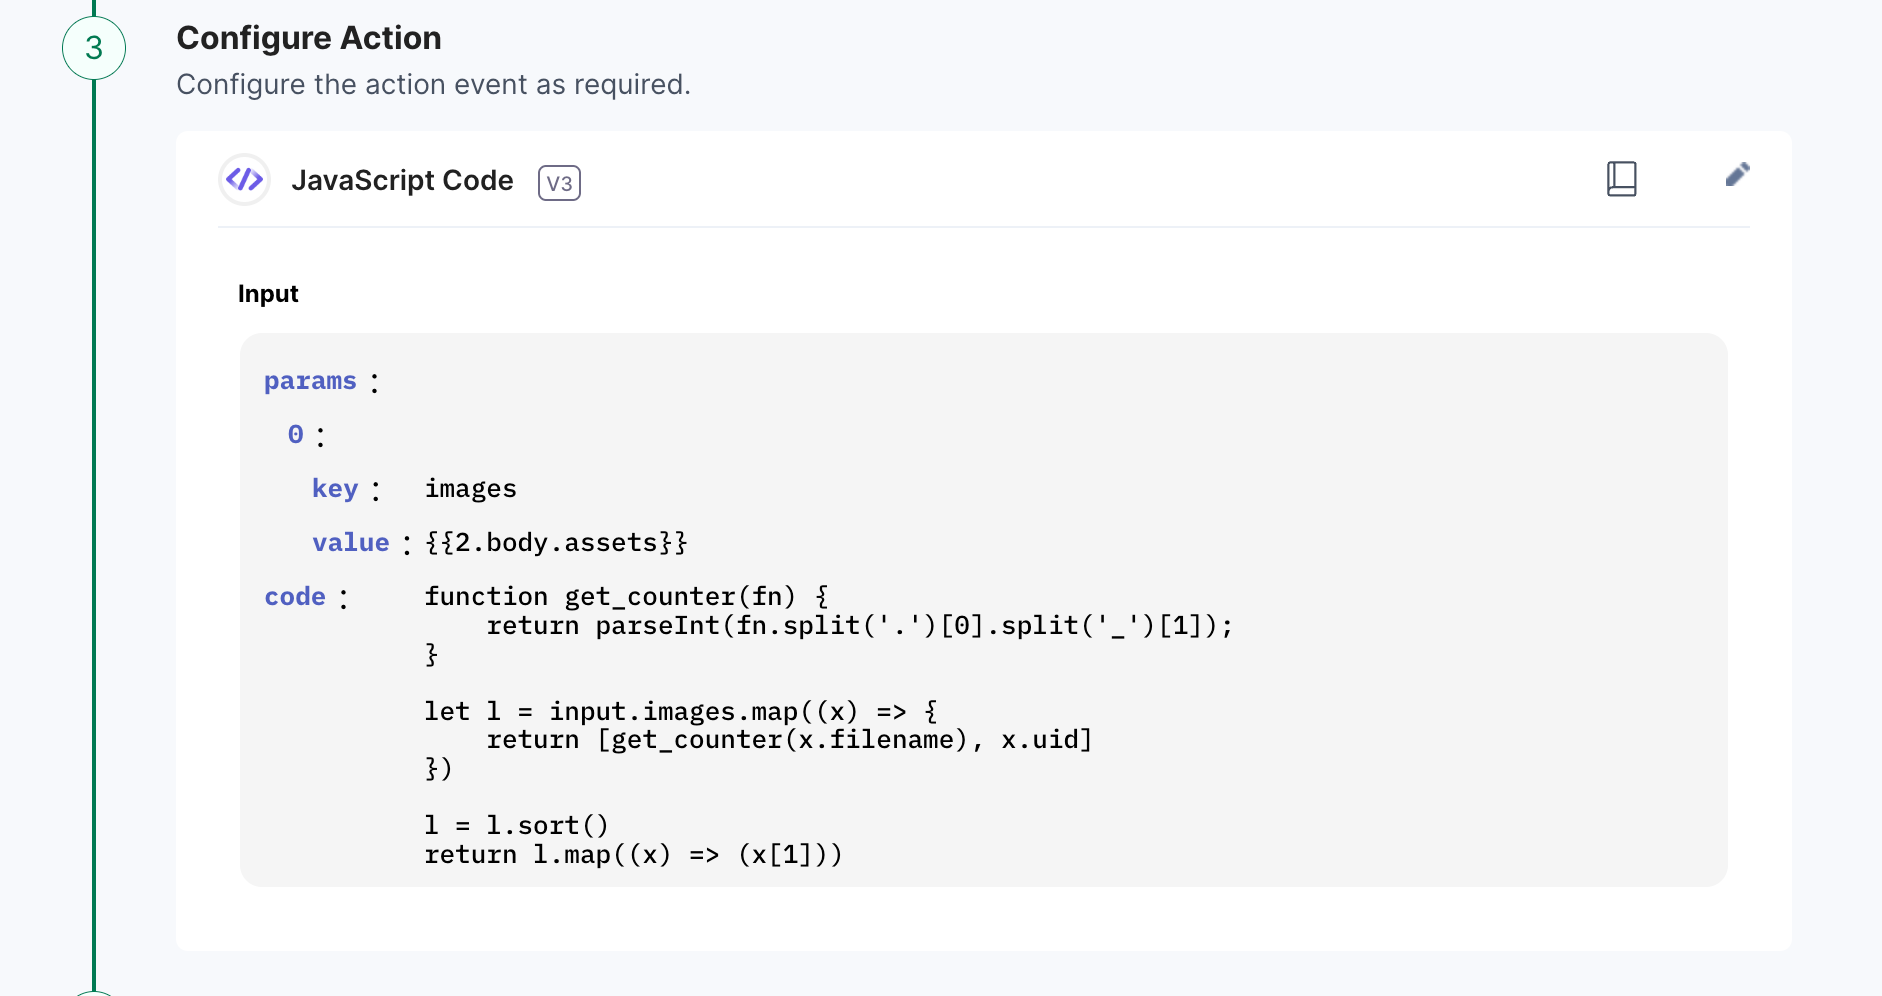
Your input looks like this:
Sort the images
In step three we loop through the assets associated with the product key. We sort according to the latter part of the filename (123123_2.jpg) and return just the sorted list of UID’s.
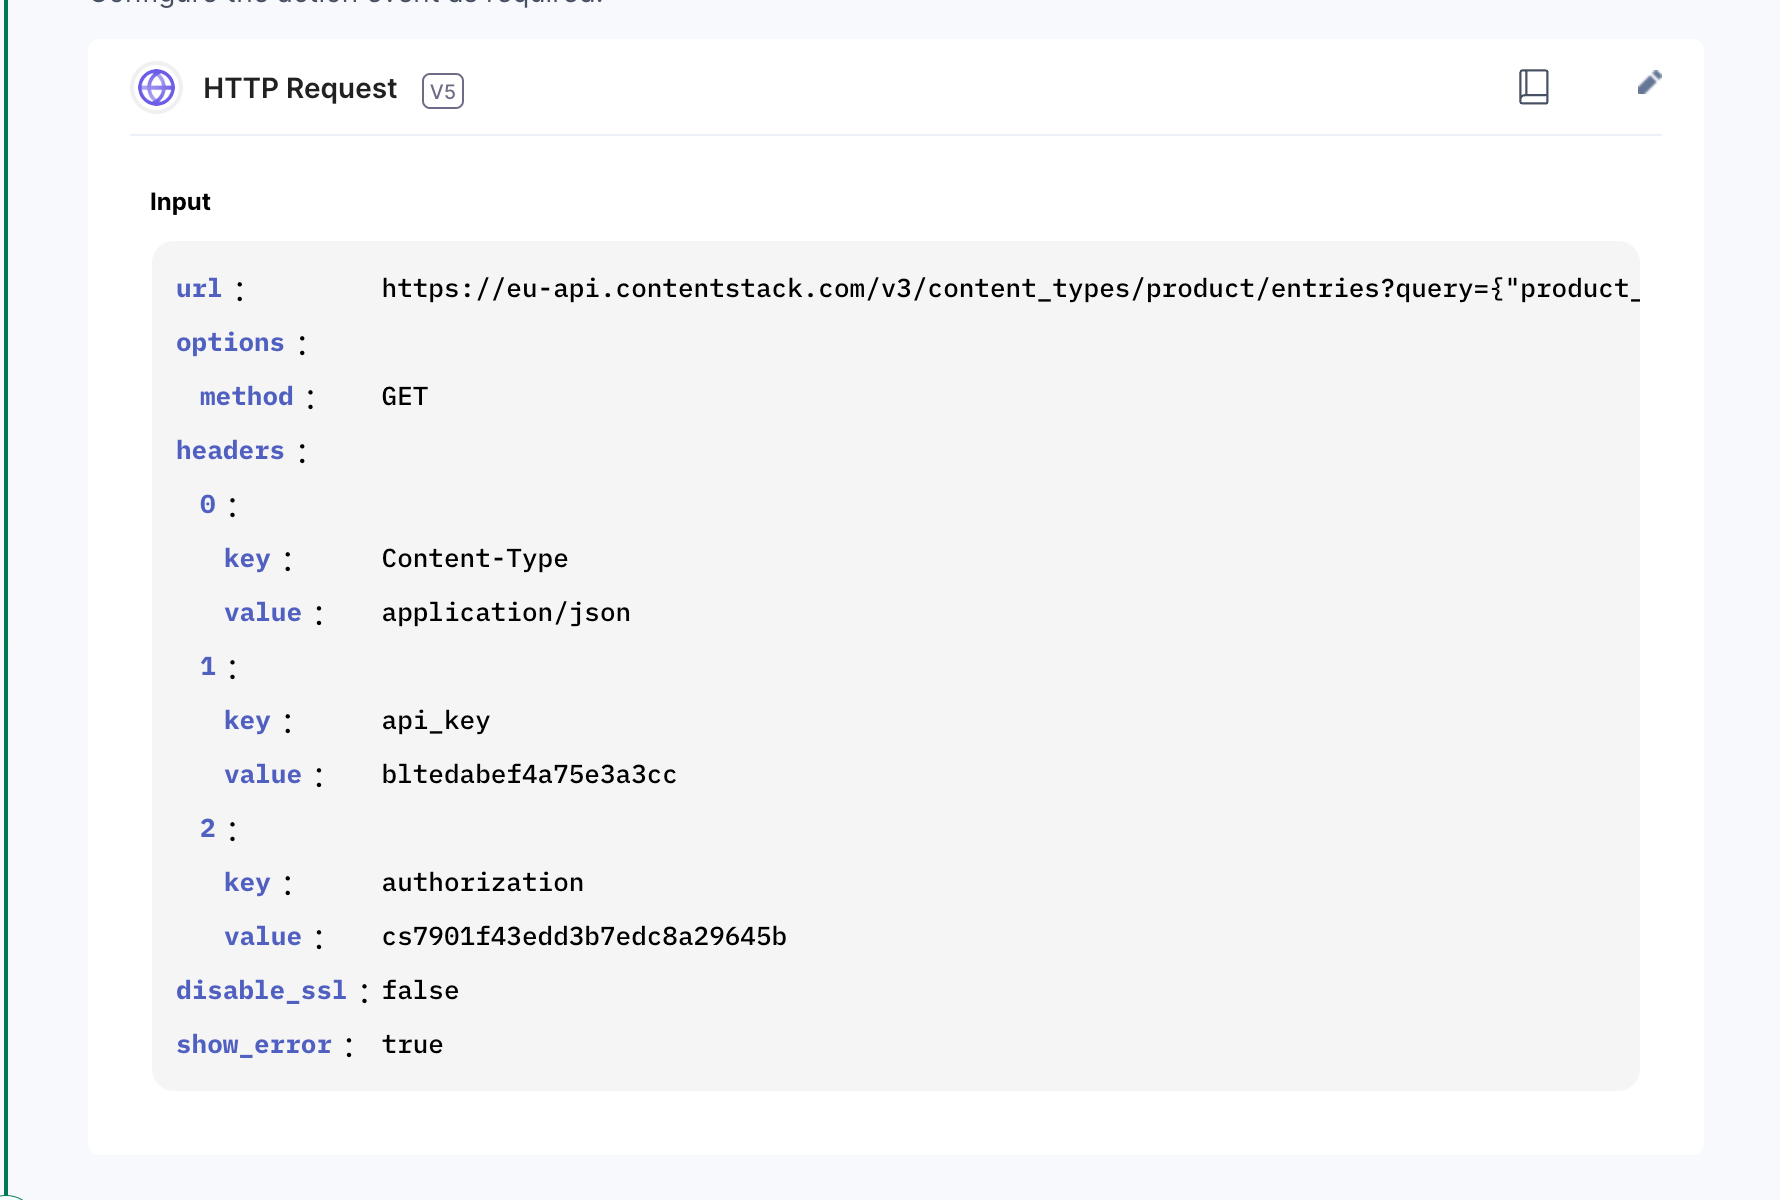
Fetch the entry for the given product key
The trigger is a simple HTTP trigger, when testing it you should have a product_key query parameter so the autocomplete in step 2 can pick it up.
The full URL should be: https://eu-api.contentstack.com/v3/content_types/product/entries?query={"product_id":"{{1.query.product_key}}"}
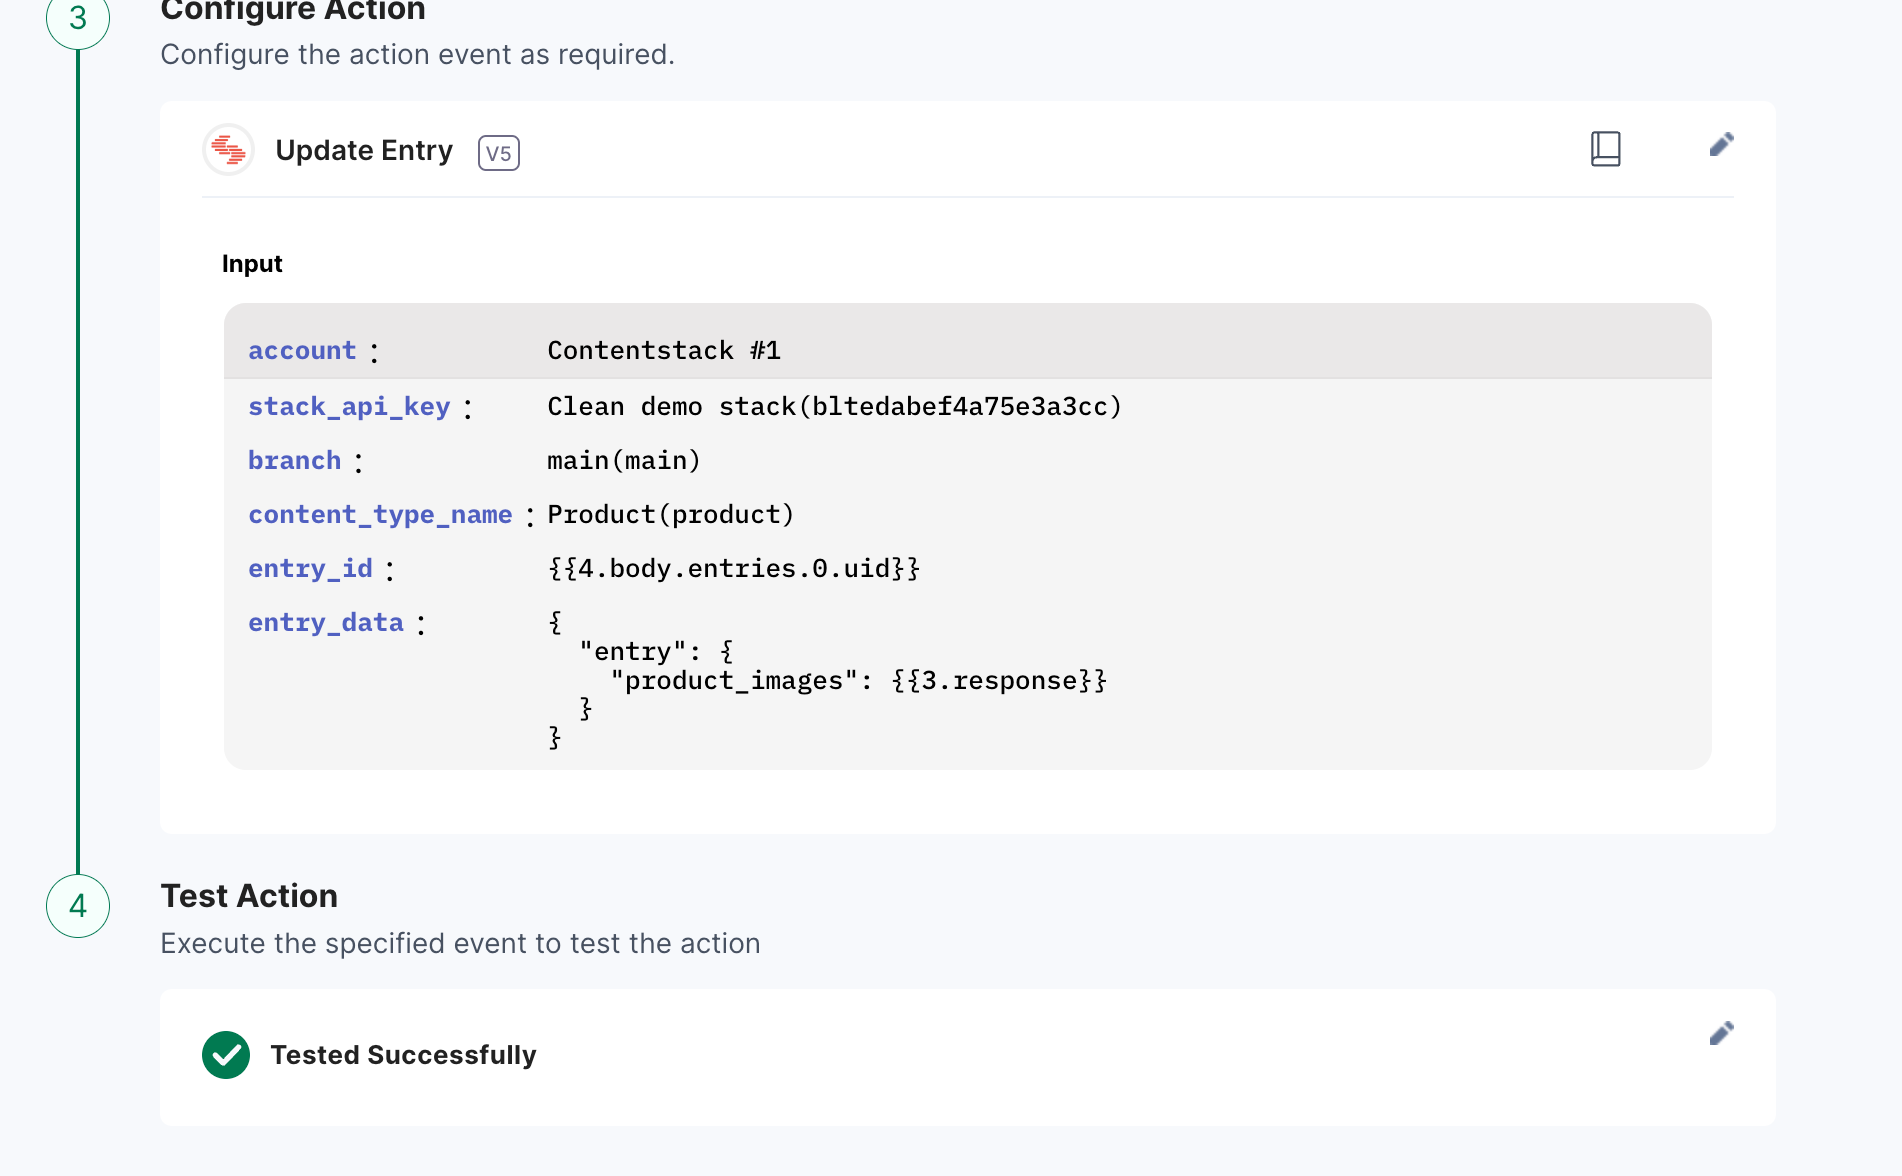
Update entry with sorted list of asset UIDs
In the final step, we update the product entry with an updated and sorted list of asset UIDs
Trigger automation from Entry Sidebar widget
The final step is to set up an easy way to trigger the URL, one method (outside of scope for this guide) is to set up a Entry Sidebar widget with the following code (set unique_automation_key so it matches the URL from Step 1.):
<html><head><meta name="viewport" content="width=device-width, initial-scale=1.0" /><link href="https://www.contentstack.com/sdks/contentstack-ui-extensions/dist/latest/ui-extension-sdk.css" rel="stylesheet" type="text/css" media="all"><script src="https://www.contentstack.com/sdks/contentstack-ui-extensions/dist/latest/ui-extension-sdk.js"></script></head>
<body>
   <script>
       window.extensionField = {};
       var product_key = null;
       ContentstackUIExtension.init().then(function (extension) {
           extensionField = extension;
           product_key = extensionField.entry.getField("product_key").schema.value;
       })

       function trigger_automation() {
           // URL from automation trigger
           var url = "https://eu-app.contentstack.com/automations-api/run/<unique_automation_key>?product_key=" + product_key;
           // Trigger the automation
           fetch(url)
       }
   </script>
   <button onClick="trigger_automation()">Sync product images for this entry</button>
</body></html>
More articles in "Solution Guides"
