


.jpg?format=pjpg&auto=webp)


AI-Generated SEO Keywords with Automate
Overview
This solution triggers an Automation in a workflow stage change that asks ChatGPT to identify keywords from a field and then add it to the entry as a list.
Tactical Rundown
- Create a content type called “Page” with a Global field called “SEO.” Download and import from this zip file (Only available internally at Contentstack).
Then import the Global field before the content type. The content type and global field are unrelated to Automate functionality, but selected fields are needed for this guide to run successfully. The global SEO field also aligns with the recommended
best practices for SEO.
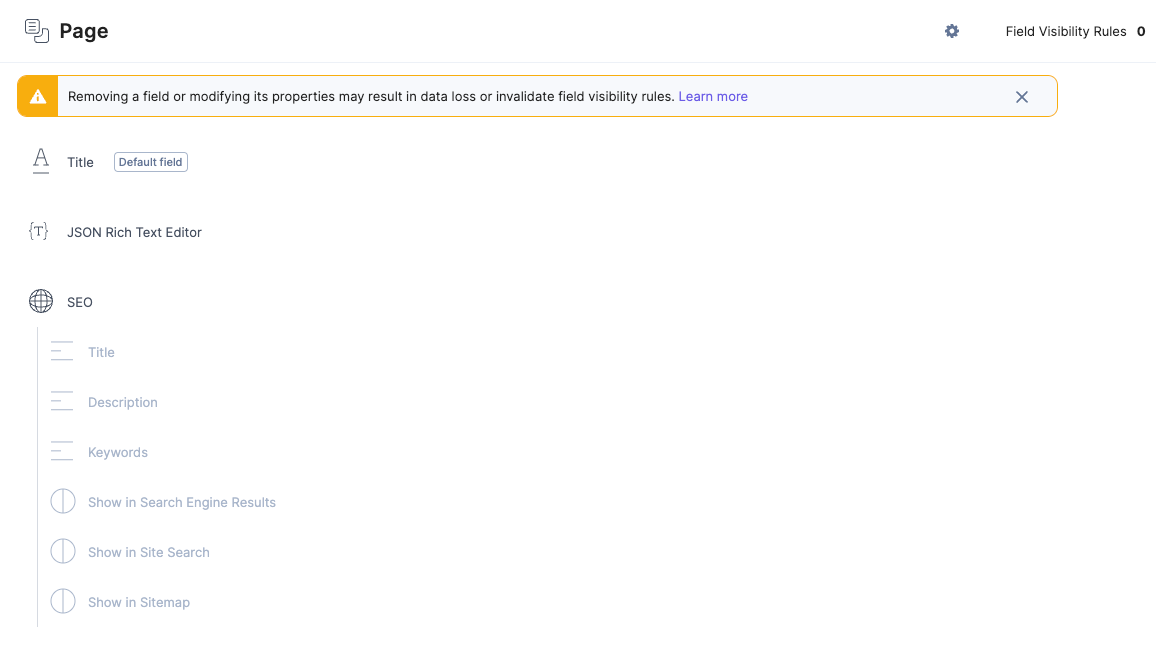
- Define a Workflow with the following workflow stages (or similar):
- Draft
- Generate SEO
- Review
- Complete (Not needed in this guide per se, but is usually included)
Note: No Workflow Stage Transition Rules are needed for this guide to work.
- Navigate into Automate and either use an existing project or create a new one.
- Create an Automation called, e.g., “ChatGPT - Auto Generate SEO content” and optionally add a description.
- Configure the Automation with the Contentstack connector and a Workflow trigger:
- Choose the Contentstack connector
- Choose the Workflow trigger
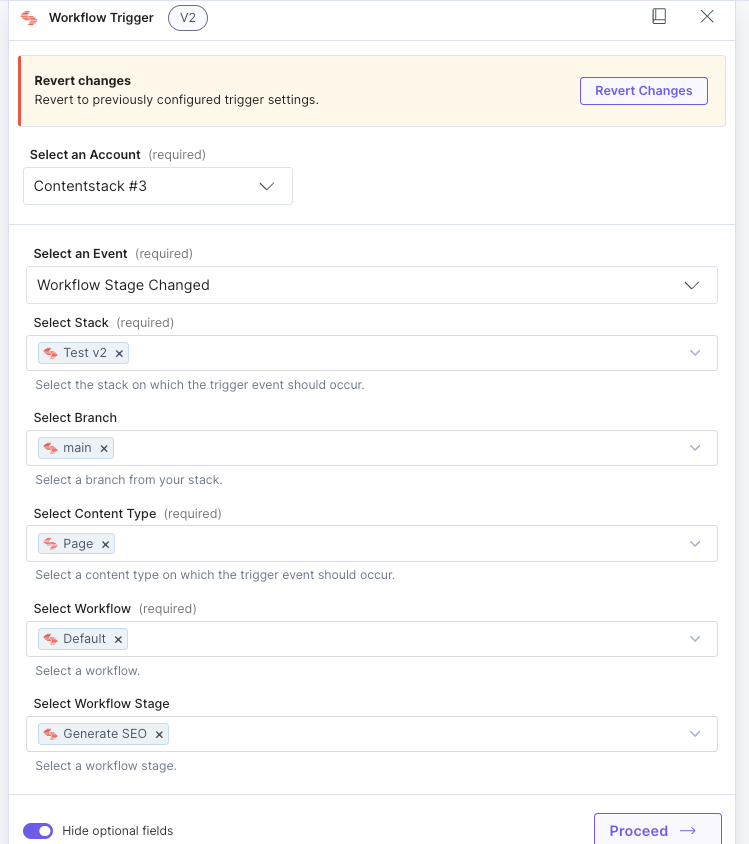
- Configure the Workflow trigger as follows:
- Account: Add a new Contentstack account if needed and choose that Contentstack account for authentication
- Event: Workflow Stage Changed
- Select Stack: Find the correct stack from the dropdown
- Branch: Main
- Select Content Type: Page
- Select Workflow: Find the Workflow defined in Step 2
- Select Workflow Stage: Generate SEO
- Click Show optional fields.
- Click on Proceed and then Test Trigger
Note: You must move an entry to the “Generate SEO” Workflow stage before testing to generate accurate testing data).
- Click Save and Exit.
- Get the entry using the Contentstack Connector employing the data generated by the test executed in Step 5:
- For Configure Action Step, select the Contentstack Connector.
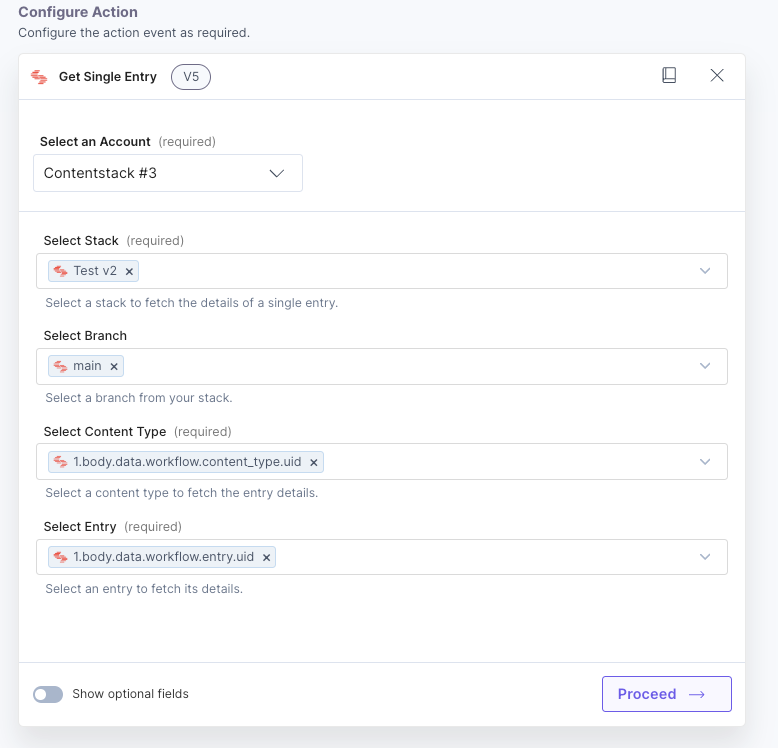
- Select Get a Single Entry.
- Configure the action as follows:
- Account: Select the Contentstack Account already created.
- Stack: Same stack as earlier.
- Select Branch: Main (again).
- Select Content Type: You can hardcode the page or use the suggested content type uid: 1.body.data.workflow.content_type.uid. We recommend using the variables instead of hardcoding anything.
- Select Entry: To identify what entry to get, we use the entry uid from the workflow stage change output. In our case, that would be 1.body.data.workflow.entry.uid. It should come up as suggested, but you can also find it under the Output from Previous Steps link.
- Click on Proceed and then Test Action.
- Click on Save Action.
- Convert the JSON RTE value into a string if necessary before sending it over:
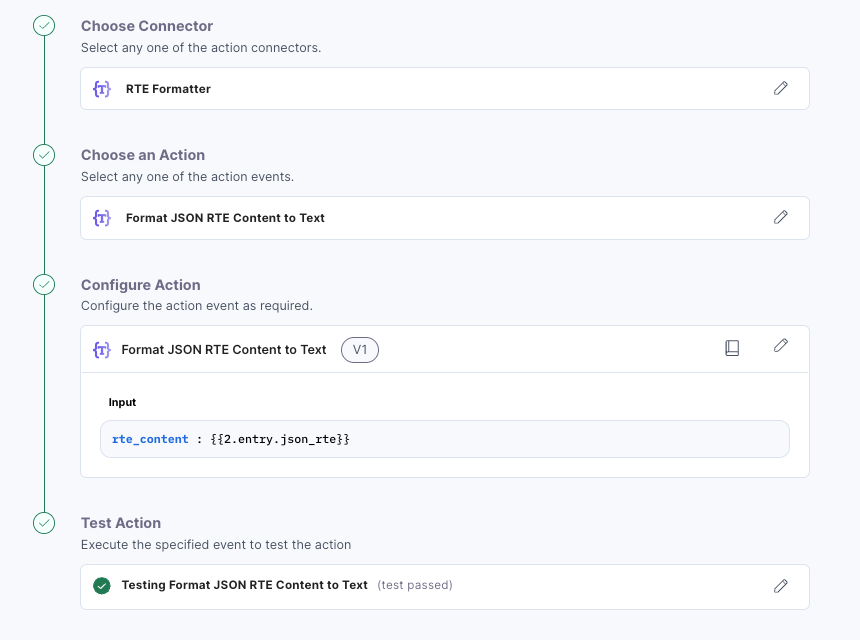
- Add a new Action and click on the RTE Formatter Connector.
- Select Format JSON RTE Content to Text.
- Pick from the last output (Output from Previous Steps) and find the content from the JSON RTE. In our example, it is 2.entry.json_rte.
- Click on Proceed and then Test Action. You should see the value of the JSON RTE in a simple string format as the output.
- Click on Save and Exit.
- Connect to ChatGPT for keyword generation:
- For the next step, click on Action.
- Find ChatGPT in the list of available Connectors.
- Select Chat.
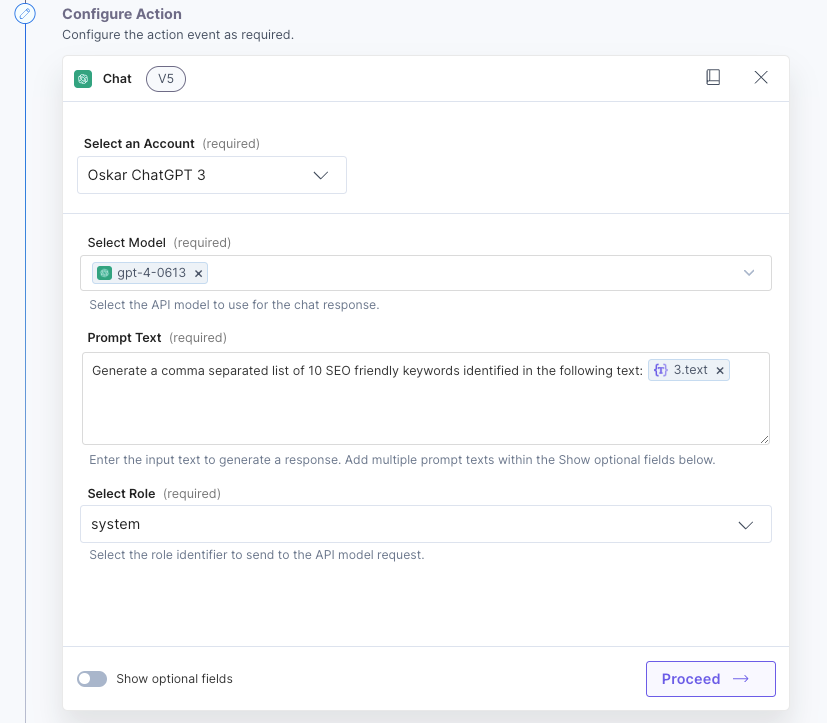
- Configure the action as follows:
- Account: Add a new Account to authenticate to ChatGPT.
- Select Model: Select the model from ChatGPT that you choose. We recommend version 4 at this time.
- Prompt text: Insert something like this: Generate a comma-separated list of 10 SEO-friendly keywords identified in the following text: followed by the text output variable from the RTE Formatter Action.
- System Role: All different roles should work, but we recommend System.
- Click on Proceed and then on Test Action. Review the Keywords returned by ChatGPT to verify that the keywords match your requirements. If needed, you can step back into the ChatGPT Action and modify it.
- Click on Save and Exit.
- Update the Contentstack Entry with the keywords provided by ChatGPT:
- Add a new Action and add the Contentstack Connector.
- Select Update Entry.
- Configure the action as follows:
- Account: Use the same account as defined in earlier steps.
- Select Stack: Use the same stack as earlier.
- Select Branch: Main.
- Select Content Type: Use the suggested content type or find it in the previous outputs.
- Select Entry: Use the suggested entry uid or find it in the previous outputs.
- Entry Data: Here we insert the entry JSON as required in order to save the entry (Equal to using the Management API). You can click the right arrow to the right of the input to generate the correct schema for the entry.
The JSON in our example looks like this, where it picks certain variables from the previous outputs to insert into the payload:
{
  "entry": {
    "title": "{{2.entry.title}}",
    "seo": {
      "title": "{{2.entry.title}}",
      "description": "",
      "keywords": "{{4.response.0.message.content}}",
      "enable_for_robots": true,
      "enable_for_site_search": true,
      "enable_for_sitemap": true
    }
}
- Click on Proceed and then Test Action.
-
If the test proves successful (The message displayed should say at the top that the entry update was “successful”), you can locate the entry in your stack and verify that it has been updated correctly.
- (Optional): Automatically move the entry again between workflow stages and assign it to a reviewer (or a group of reviewers).
- Create a new Action and choose the Contentstack Connector.
- Select Set Entry Workflow.
- Configure the action as follows:
- Account: Use the same account as defined in earlier steps.
- Select Stack: Use the same stack as earlier.
- Select Branch: Main.
- Select Content Type: Use the suggested content type or find it in the previous outputs.
- Select Workflow Stage: Choose the Review stage from the dropdown (or as defined in Step 2.
- Click on Show optional fields. and set the following:
- Select Assignee ID or Role, if you want to assign this entry for review either to a certain user or a set of users with a role.
- Optionally you can select Notify via Email and insert a custom Comment to be sent to the Reviewer(s).
- Click on Proceed and then Test Action.
If the test proves successful (The message displayed should say that the workflow stage has been updated successfully) you can locate the entry in your stack and verify that it has updated correctly.
- Finally, remember to activate the Automation in the top right corner.
Final thoughts
This guide serves as an example of how to achieve AI-generated SEO keywords. You can change it or extend it to add to its functionality. A few examples could be:
- Change the entry trigger. Instead of workflow, you could trigger this on, e.g., every entry update. You could check if the keywords field has any value using trigger conditions and cancel the Automation if there is value.
- Change it from ChatGPT to something else: E.g., AWS Bedrock or Azure’s ChatGPT.
- You can add Action steps to add value to more fields automatically, e.g., the SEO Title and/or SEO Description.
- You can add more Action steps to debug or notify about the process. E.g., sending information to Slack, email, or other channels.
More articles in "Solution Guides"
