

.svg?format=pjpg&auto=webp)
.svg?format=pjpg&auto=webp)
.png?format=pjpg&auto=webp)


.png?format=pjpg&auto=webp)
Cache Invalidation for the Website Using Automate
Invalidate cached content when an entry is published or unpublished to reflect the updated data on the client side and always return the updated content.
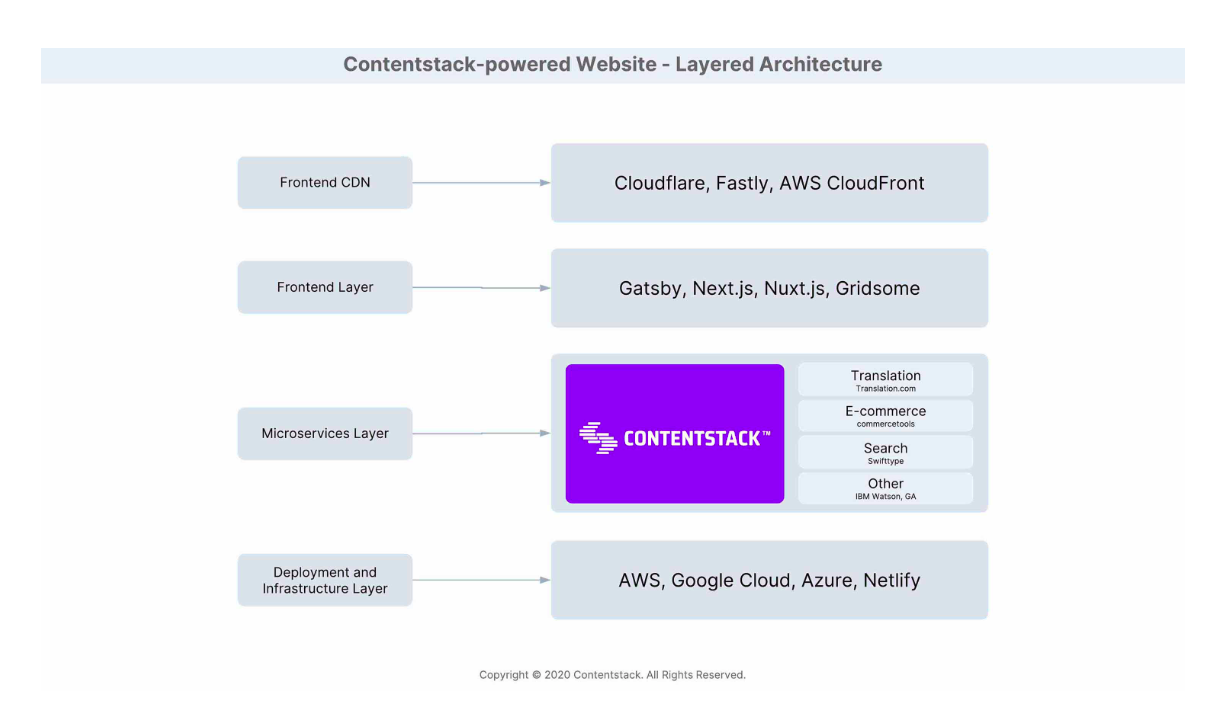
Diagram Walkthrough
Here's a diagrammatic representation of a Contentstack-powered website.
Tactical Rundown
First, let's set up an Automation Trigger for entry publish and unpublish events.
Steps to create automation for entry publish/unpublish events:
- Go to Automate, create a new project, and create an Automation.
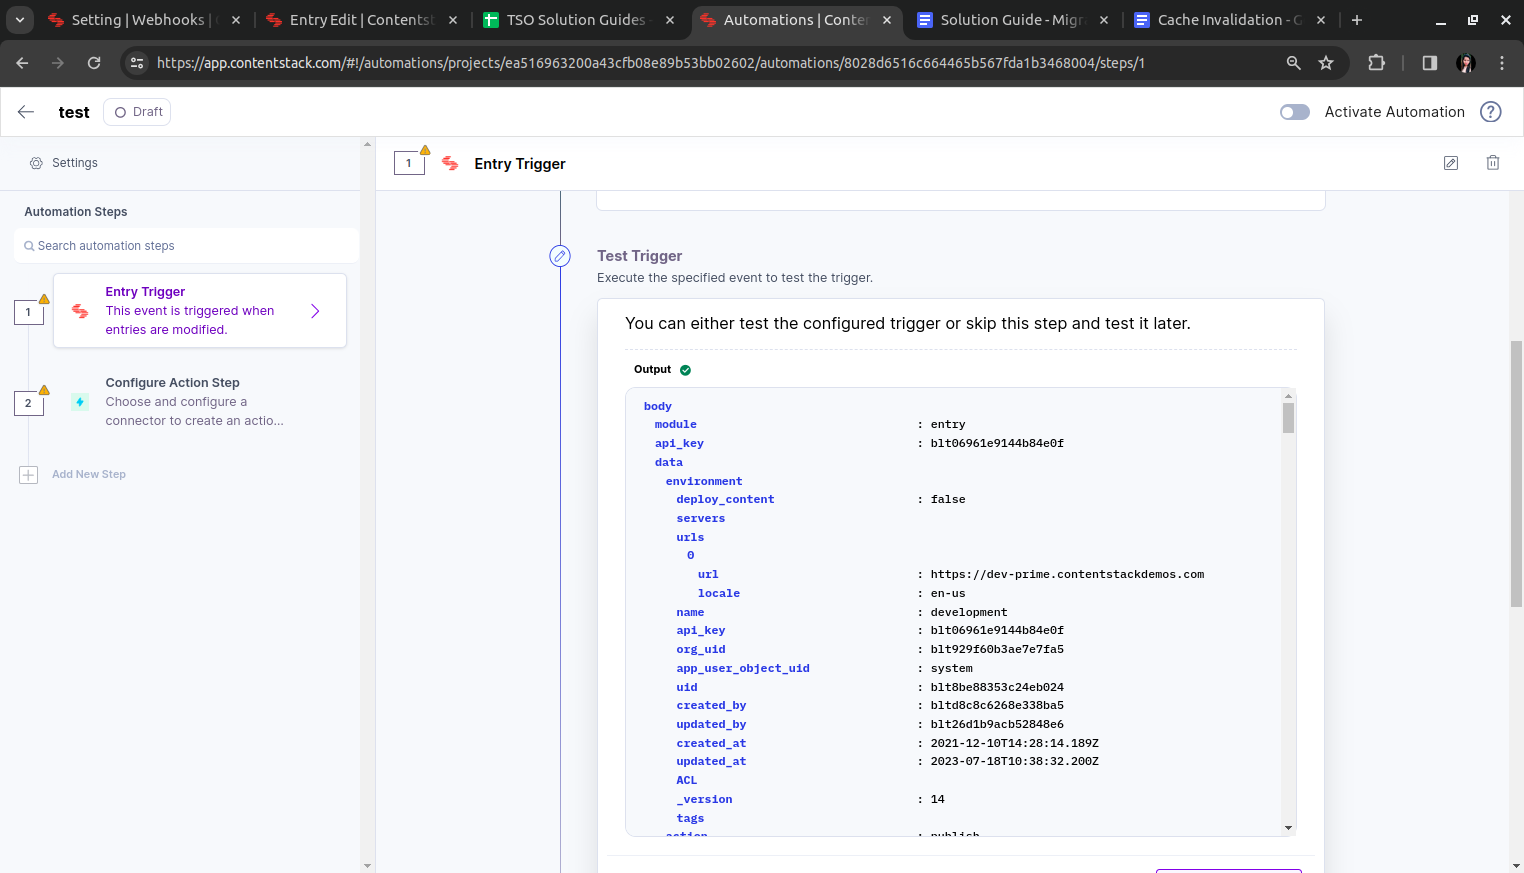
- Configure Automation Trigger
- Choose Contentstack as a trigger connector.
- Select Entry Trigger.
- In the next step, add/select your Account, select the Entry Publish/Unpublish event, and your Stack.
- Test Trigger, Save and Exit
- Configure Action Step
Prerequisites: Set up lambda function for invalidation using Cloudfront, which will be used in the HTTP connector.
Lambda code:const AWS = require('aws-sdk'); exports.handler = async (event) => { const { body, headers } = event; const cloudfront_distribution_id = headers.cloudfront_distribution_id || ''; let idArray = cloudfront_distribution_id.split(','); const responses = []; for (const id of idArray) { if (id !== '') { const url = body && body.entry && body.entry.url; const cloudfront = new AWS.CloudFront(); const params = { DistributionId: id, InvalidationBatch: { CallerReference: Date.now().toString(), Paths: { Quantity: 1, Items: [url], }, }, }; try { const data = await cloudfront.createInvalidation(params).promise(); responses.push({ message: `Cache cleared for Distribution ID: ${id}`, statusCode: 200 }); } catch (err) { responses.push({ message: err.message, statusCode: 500 }); } } } return { statusCode: 200, body: JSON.stringify(responses), }; };- Create an Action Step
- Choose “HTTP” connector
- Select HTTP Requests as an action event.
- Configure the action events as required:
- Set your lambda url as a request url in the URL field.
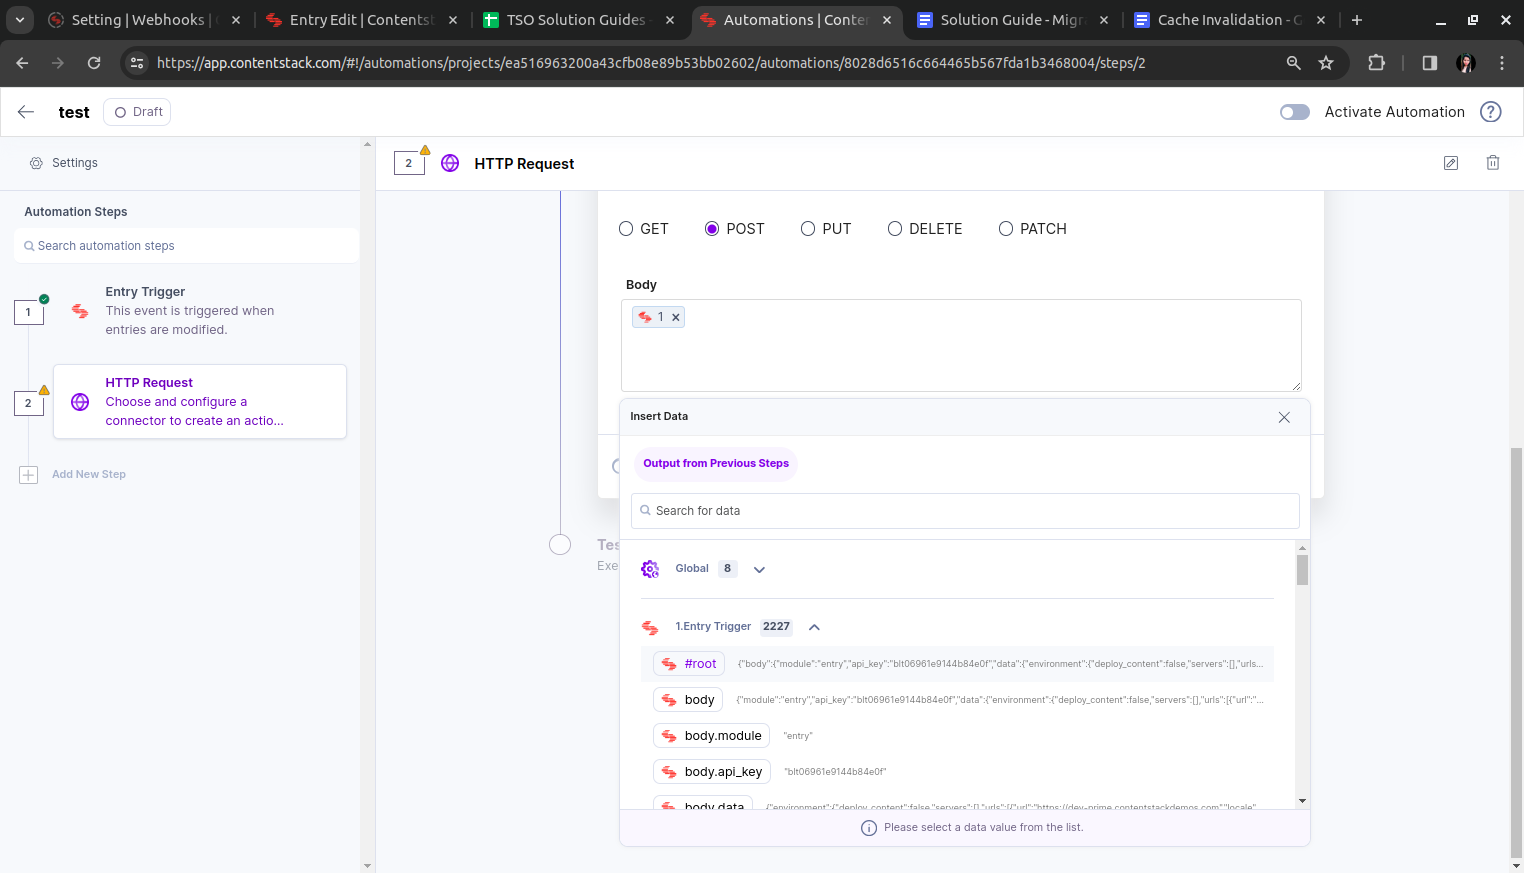
- Choose “POST” as a method of your request.
- Add #root object in the request’s body.
- Toggle Advanced options and set the following headers:
- Content-Type: application/json
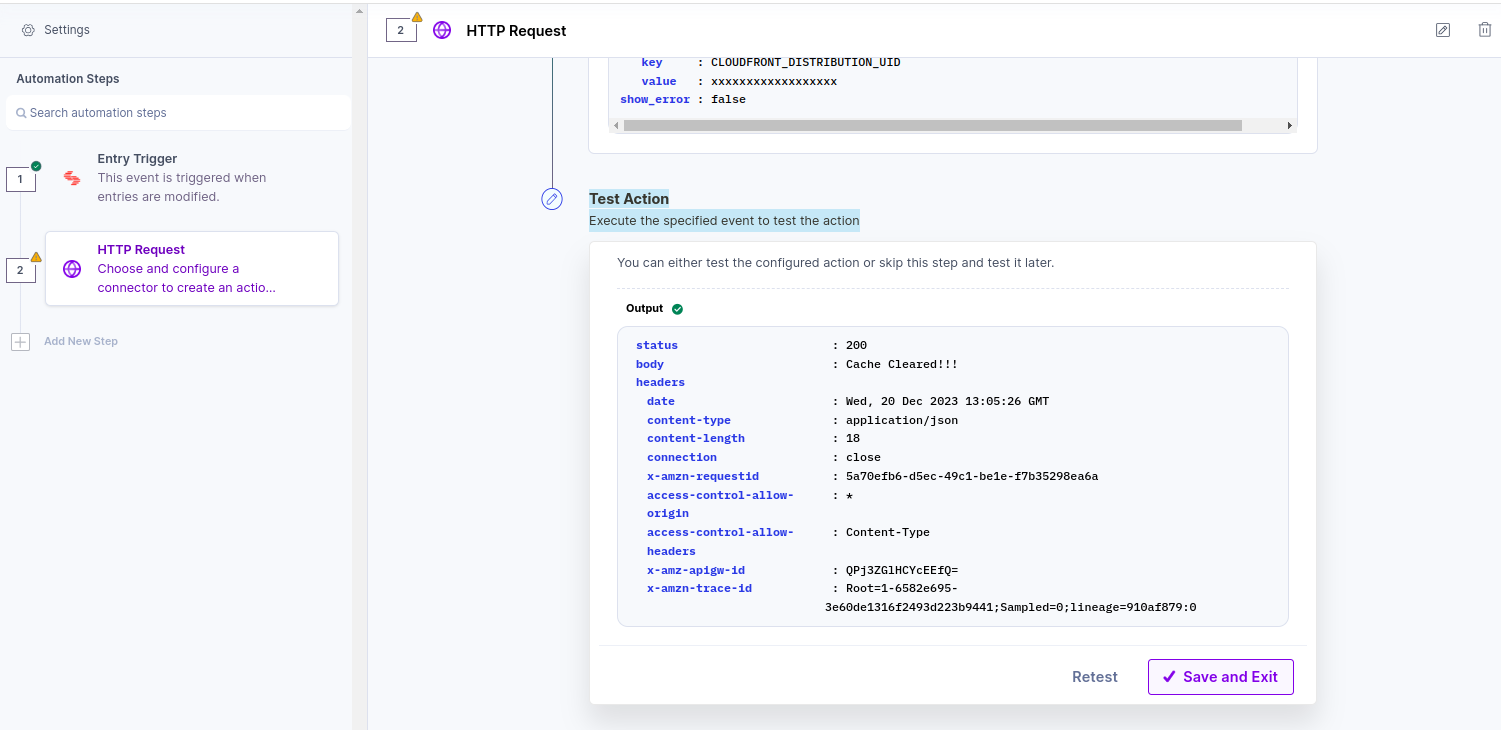
- CLOUDFRONT_DISTRIBUTION_UID : <<distibution_uid>>
- Test action and save and exit
Activate Automation to run in a live environment.
Related guides:
Was this article helpful?
More articles in "Solution Guides"
