

.svg?format=pjpg&auto=webp)
.svg?format=pjpg&auto=webp)
.png?format=pjpg&auto=webp)


.png?format=pjpg&auto=webp)
Asset-based Entry Creation
Streamlines the process of creating an entry after creating a product asset. It helps reduce user click-through time and reduces the amount of busy work they need to do.
Tactical Rundown
Automation 1 - Asset Detail Page Creation
Here's the overview of the Automation that you need to create:
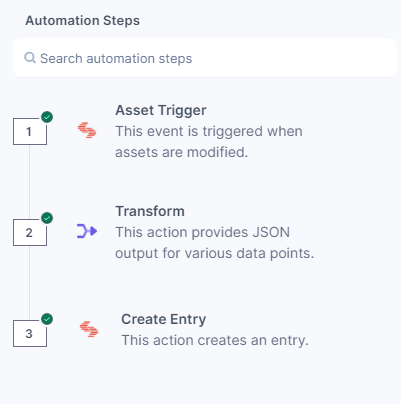
- Asset Trigger
- Select the Asset Trigger and choose Asset Created
- Select the Stack you want to target with the automation
- Transform Connector
Choose the Transform Connector
- We create a bare-bones entry creation payload with the asset details. We assume the product page uses the “Title” and “Description” fields from the asset details page.
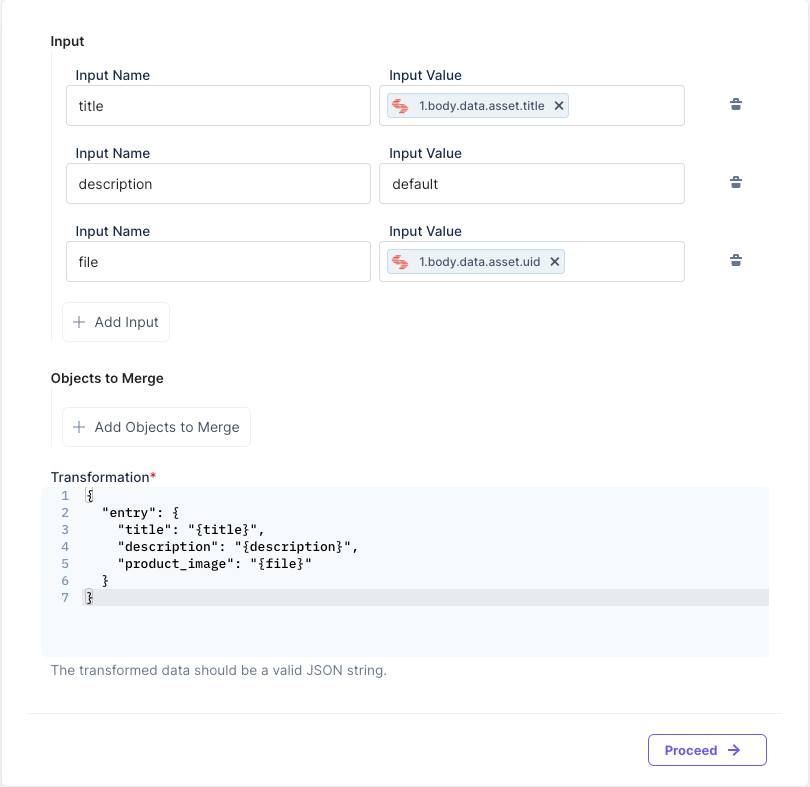
- Below is the snippet you can use to create the entry payload. Feel free to add more details to the JSON, if needed.
{
    "entry": {
        "title": "{title}",
        "description": "{description}",
        "product_image": "{file}"
    }
}
- We create a bare-bones entry creation payload with the asset details. We assume the product page uses the “Title” and “Description” fields from the asset details page.
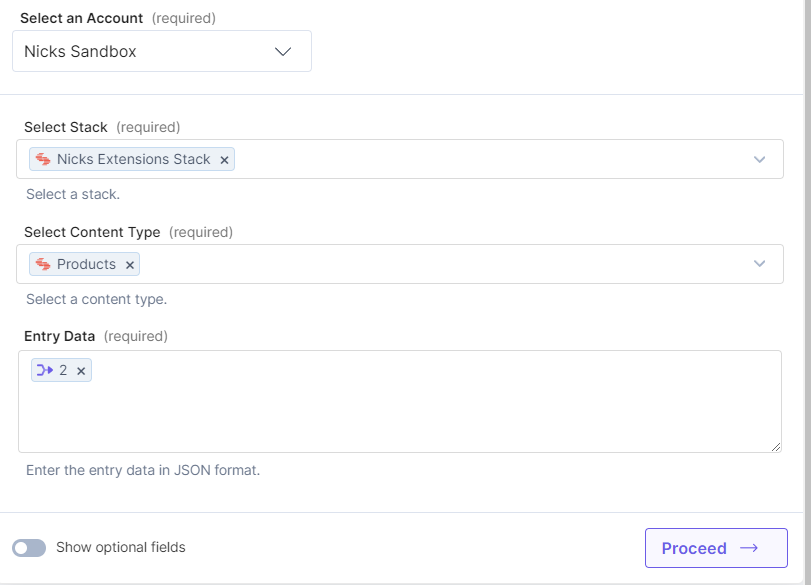
- Create an Entry Connector
- Select the stack and content type from the previous steps
- Entry data should be the transform statement you receive in Step 2
Automation 2 - Asset Update Detail Page
Here's the overview of the Automation that you need to create:
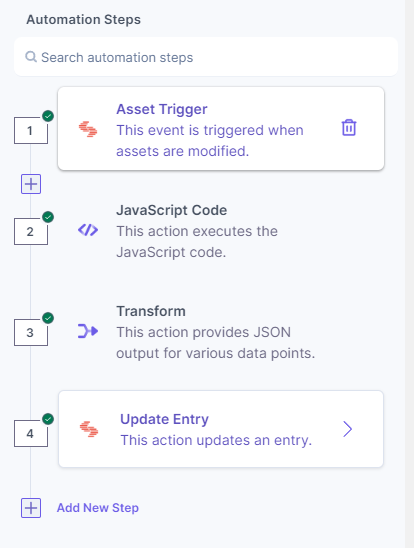
- Asset Trigger
- Select the Asset Updated trigger
- Select the same stack used in the previous automation.
- Javascript Code Block Connector
- We need to fetch the entry by UID of the asset to update the correct Product Detail Page
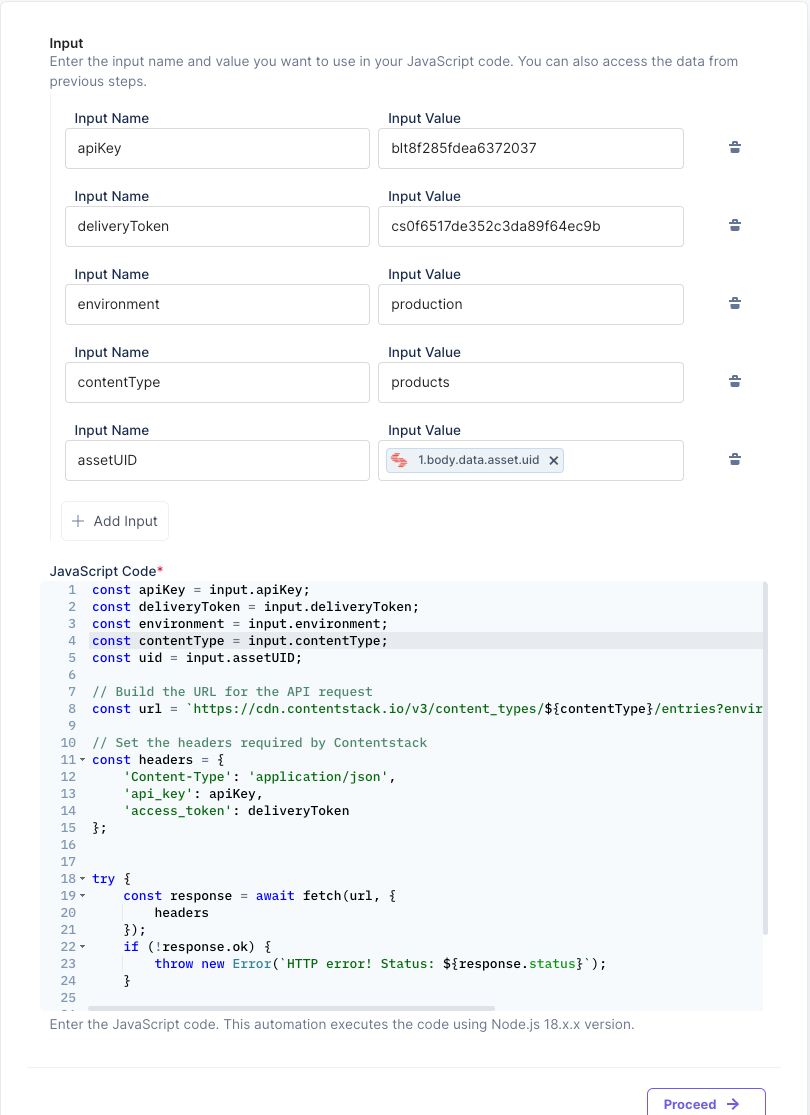
- Here's the code snippet used above:
const apiKey = input.apiKey;
const deliveryToken = input.deliveryToken;
const environment = input.environment;
const contentType = input.contentType;
const uid = input.assetUID;

// Build the URL for the API request
const url = `https://cdn.contentstack.io/v3/content_types/${contentType}/entries?environment=${environment}&query={"product_image":"${uid}"}`;

// Set the headers required by Contentstack
const headers = {
  'Content-Type': 'application/json',
  'api_key': apiKey,
  'access_token': deliveryToken
};
try {
  const response = await fetch(url, {
    headers });
  if (!response.ok) {
    throw new Error(`HTTP error! Status: ${response.status}`);
  } const data = await response.json();
  return data;
} catch (error) {
  return error.message }
- We need to fetch the entry by UID of the asset to update the correct Product Detail Page
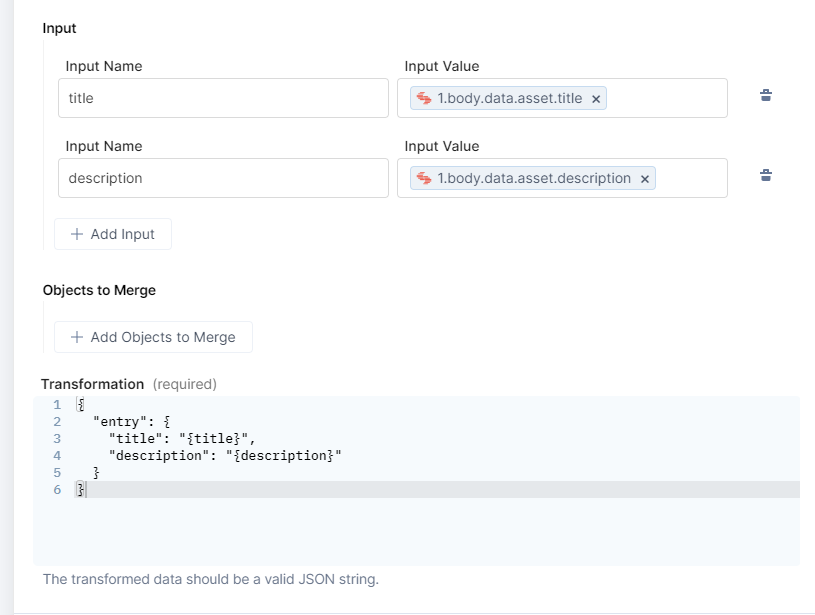
- Transform Connector
Below is what the transform statement looks like to update the entry with the new details. As you can see the input values take the title and description from the trigger event.
- Update Entry Connector
- Select the Update Entry Action
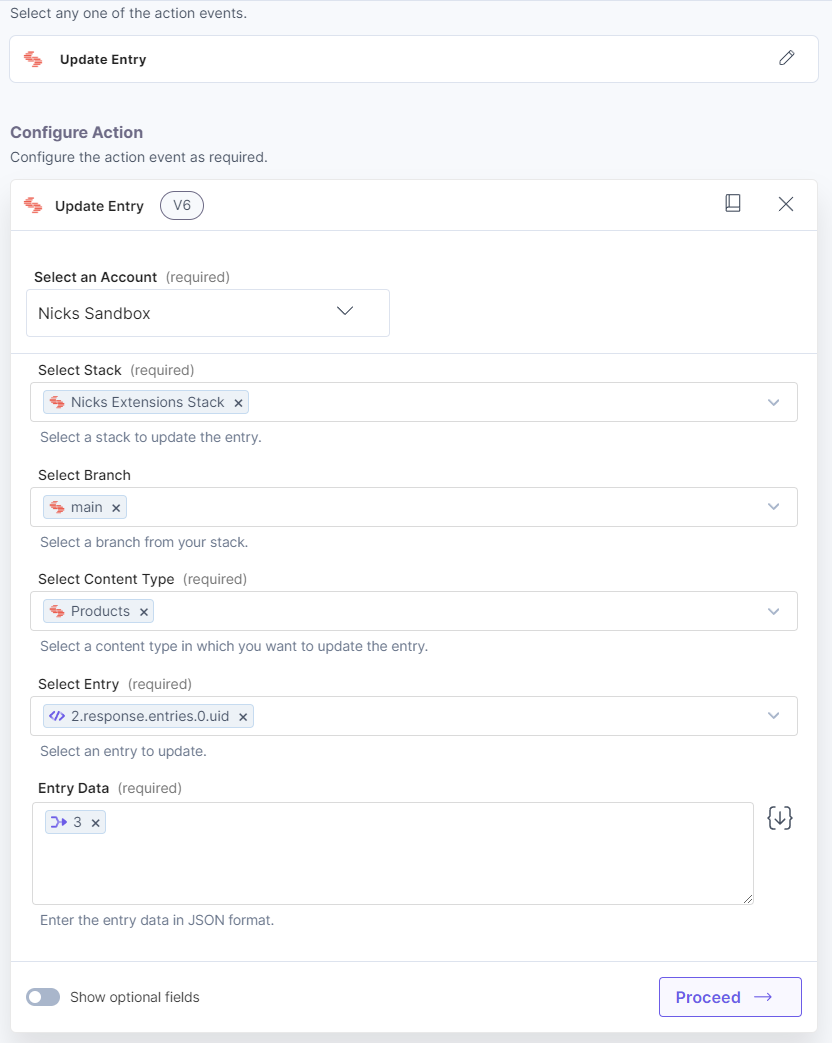
- The Stack should be from a response in step 1.
- The Content Type should be from a response in step 1.
- The Entry should be from a response in step 1.
- The Entry Data should be from a response in step 3.
- Select the Update Entry Action
Was this article helpful?
More articles in "Work with Teams"
