


.jpg?format=pjpg&auto=webp)


Launch Quick Start Guide with Vue
The fastest way to get started with Launch is to clone and deploy a sample VueJS Starter project. With Launch, you can easily create a project by importing your website code from GitHub.
Prerequisites
- Contentstack account
- Access to Launch for your organization
- GitHub account
Steps for Execution
Follow the steps given below to deploy your first Launch project using GitHub:
Note: Only the Organization Admin/Owner has the right to create projects in a stack for Launch.
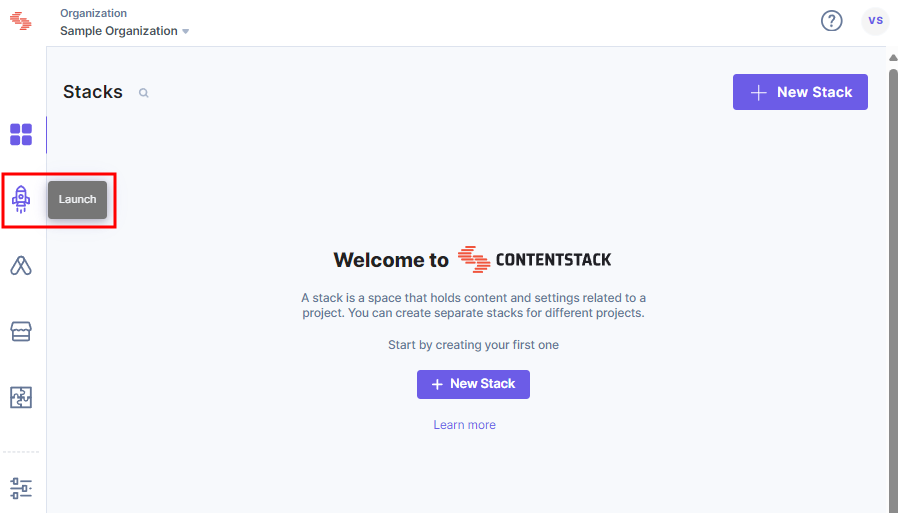
- Log in to Contentstack and click the Launch icon from the left navigation panel, as shown below:
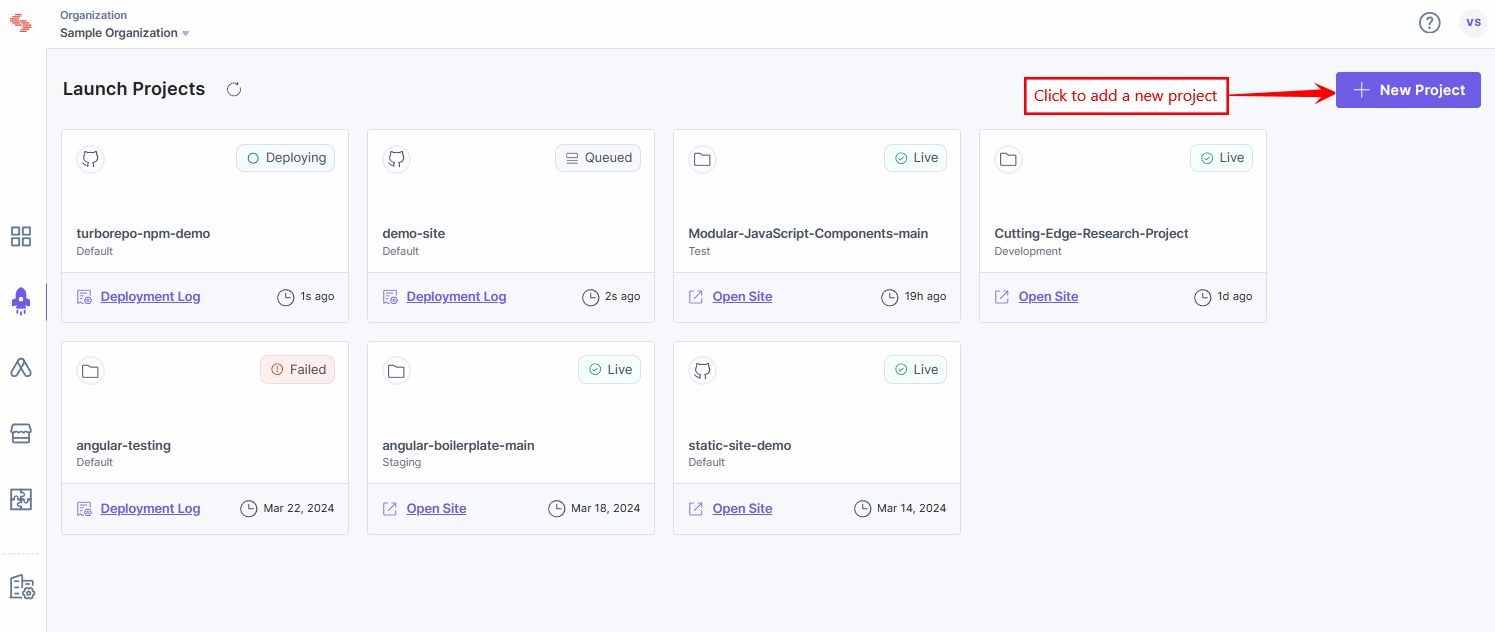
- On the Launch Projects screen, click the + New Project button to initiate the project creation process.
- From the Create New Project modal, click Import from a Git Repository.
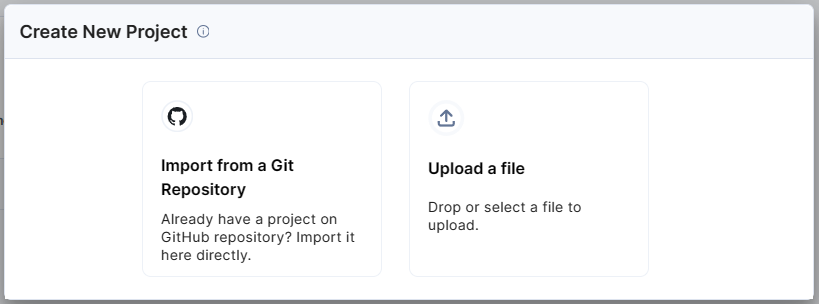
Note: You can also choose to upload a .zip file to import a project.
- Click GitHub.
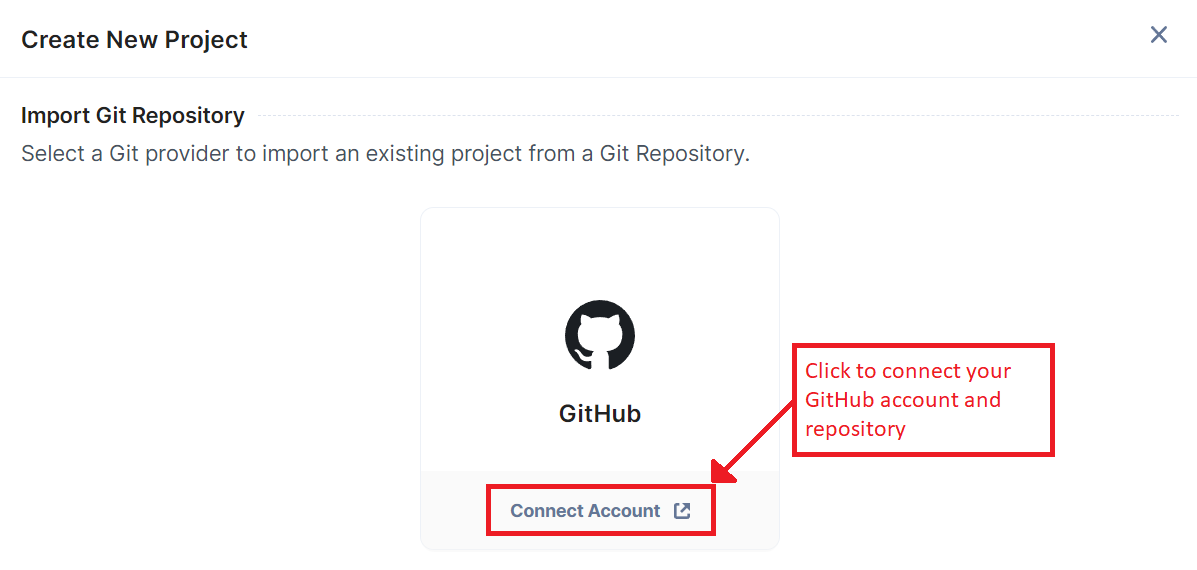
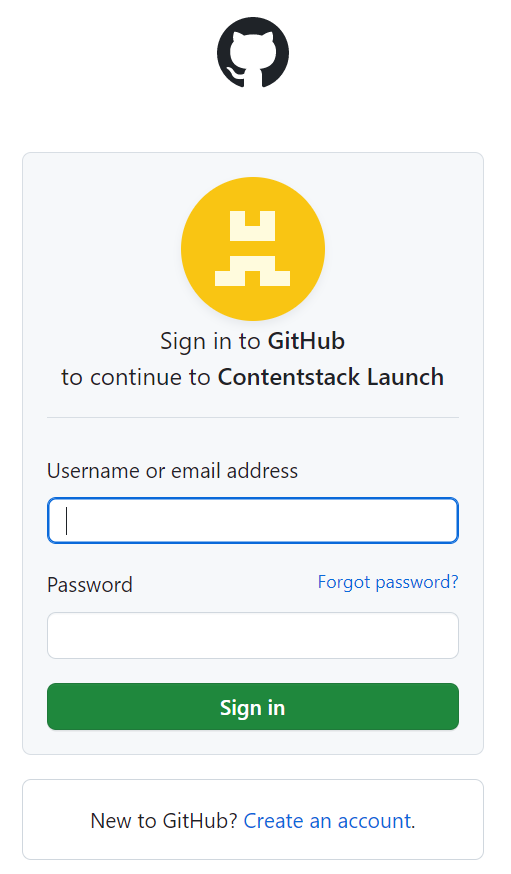
A Sign in to GitHub screen pops up. Enter your credentials and log in to your GitHub account.
Note: We have assumed that you have a GitHub account and your website code stored in the repository.
- Enter your credentials and log in.
- In the Repository access section, select All repositories.
Note: If you want to choose specific repositories, select the Only select repositories option and choose the required repository.
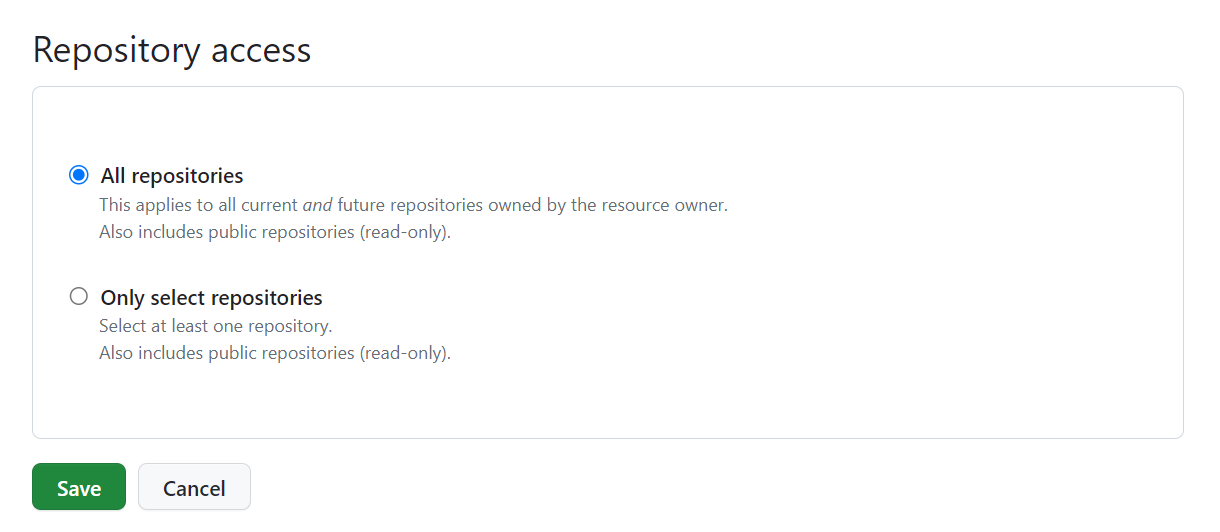
- Click the Save button.
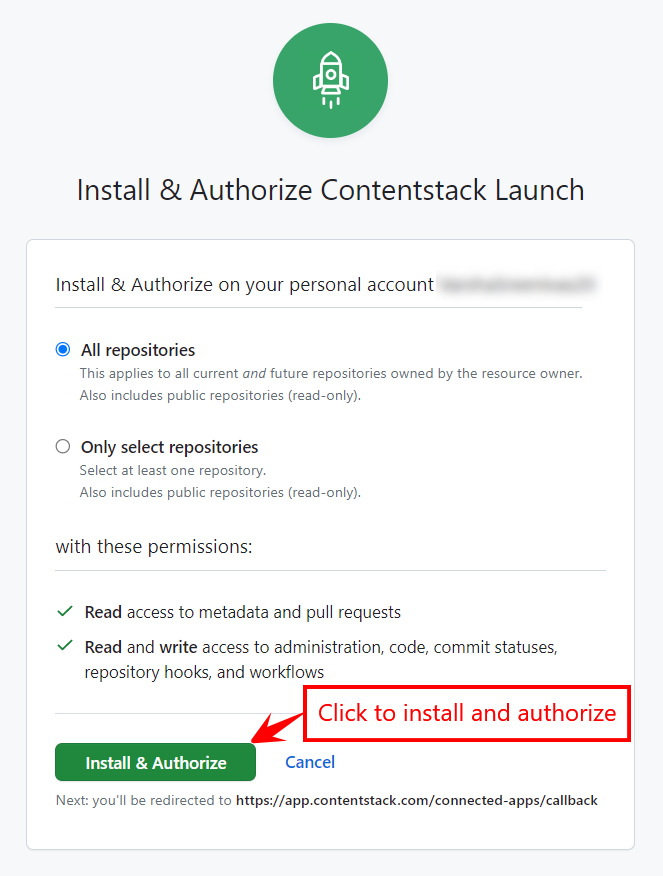
Note: If you are accessing GitHub through Contentstack for the first time, you must authorize Contentstack by clicking the Install & Authorize button after selecting All repositories.
You will be redirected to the Launch app.
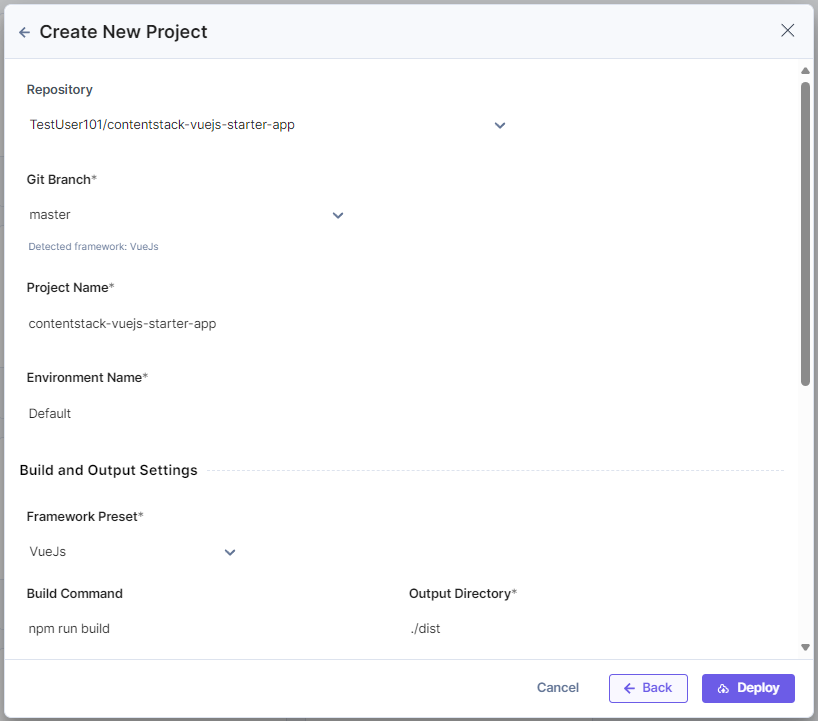
In the Create New Project modal, add the following details:
- Repository (Mandatory): Select the Git repository. In our example, we have selected the VueJS Starter App repository.
Note: When you select the repo, the Build and Output Settings section gets auto-populated with the required details.
- Git Branch (Mandatory): By default, master or main is selected as the branch. You can choose another branch from the dropdown.
- Project Name (Mandatory): Gets auto-populated on selecting the repository. You can edit it as per your requirement.
- Environment Name (Mandatory): Enter the name of the environment.
- Build and Output Settings (Mandatory): The fields in this section get auto-populated based on the VueJS framework, as discussed above.
- Environment Variables (Optional):
- Enter the key and value of one or more environment variables.
- You can also add the key-value pairs in bulk in the Bulk Edit section.
For the Contentstack VueJS Starter to work, we need to provide the following environment variables:
VUE_APP_CONTENTSTACK_LIVE_PREVIEW=<true_or_false>
VUE_APP_CONTENTSTACK_MANAGEMENT_TOKEN=<mgmt_token>
VUE_APP_CONTENTSTACK_APP_HOST=<app_host_value>
VUE_APP_CONTENTSTACK_API_HOST=<api_host_value>
VUE_APP_CONTENTSTACK_REGION=<region>
VUE_APP_CONTENTSTACK_ENVIRONMENT=<environment_name>
VUE_APP_CONTENTSTACK_DELIVERY_TOKEN=<delivery_token_of_the_environment>
VUE_APP_CONTENTSTACK_API_KEY=<api_key_of_your_stack>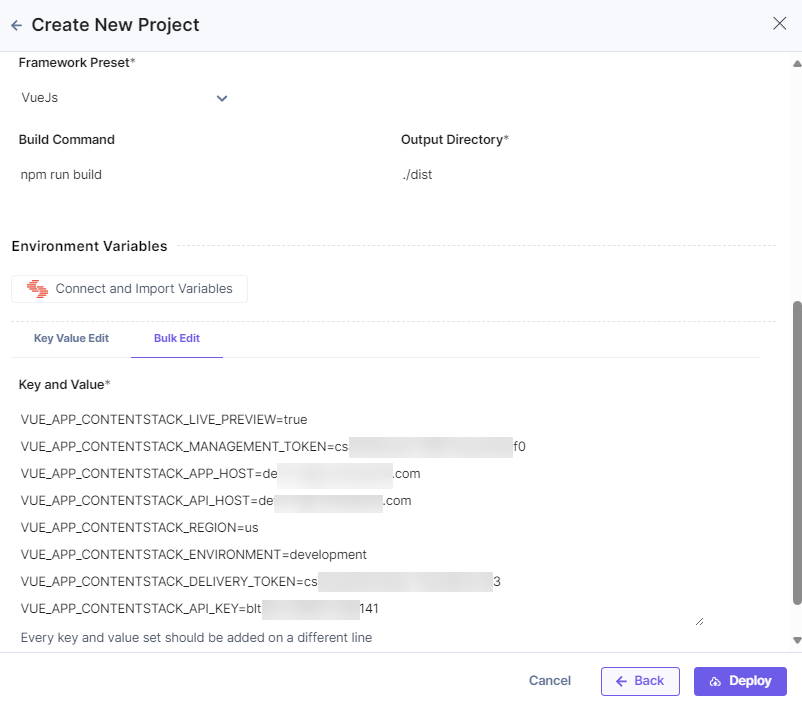
Note: Click Back to revert the changes and re-enter details.
- Repository (Mandatory): Select the Git repository. In our example, we have selected the VueJS Starter App repository.
- Once ready, click Deploy to save and deploy the project.
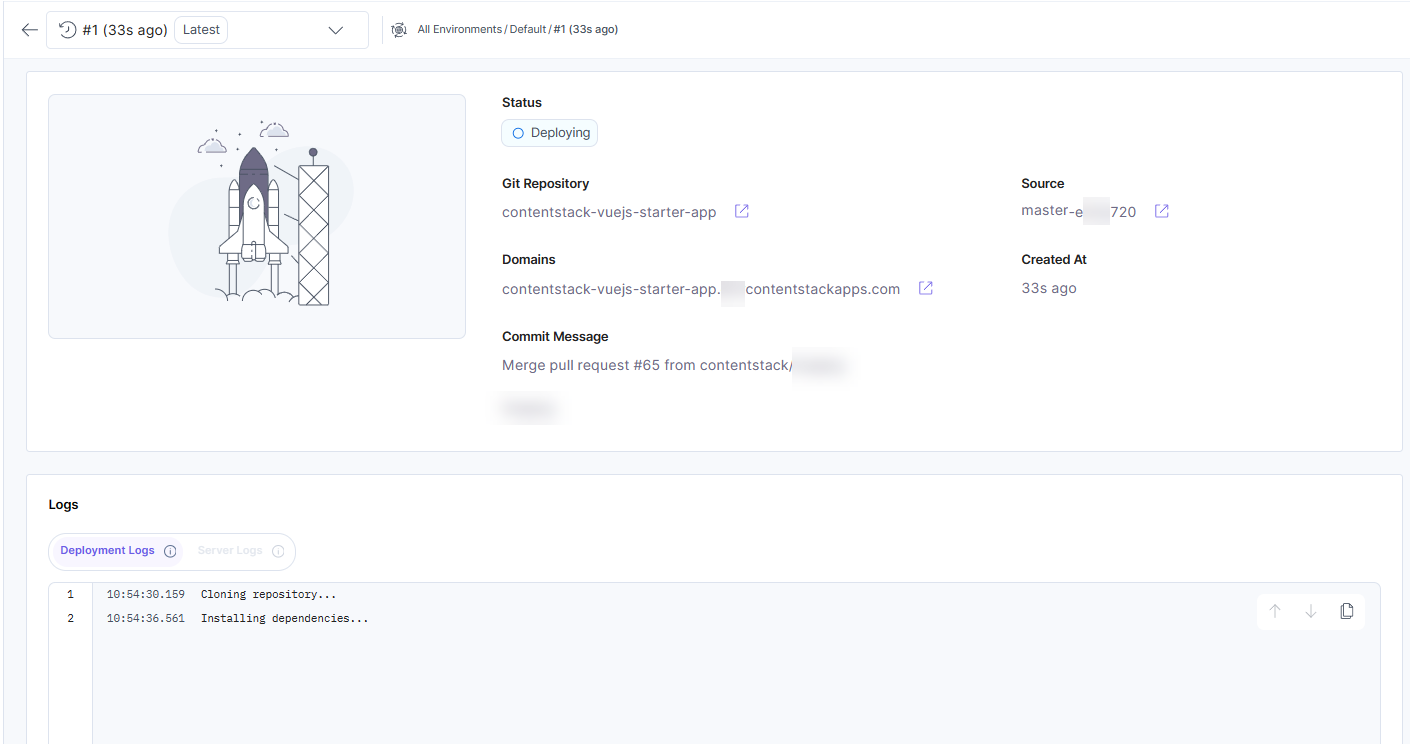
As soon as the deployment starts, you will see the Deploying status as shown in the following screenshot:
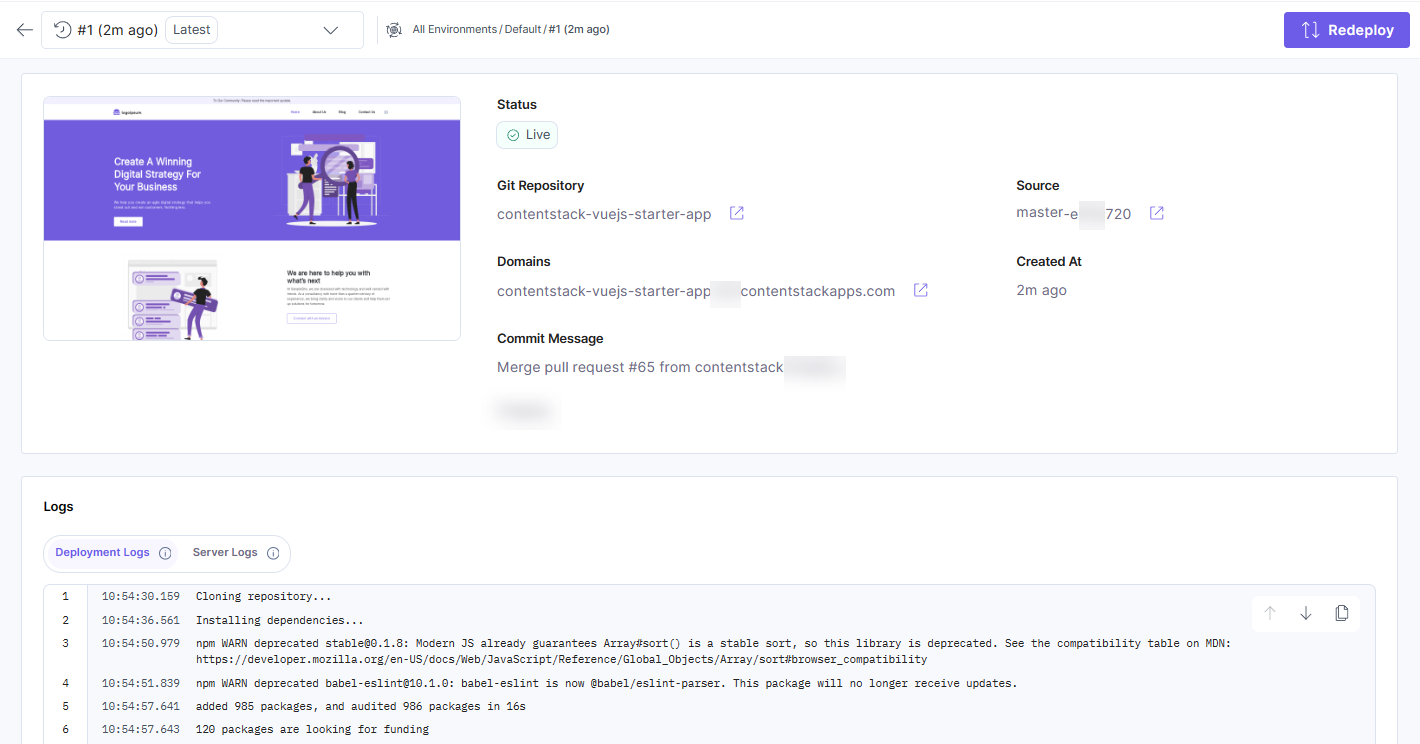
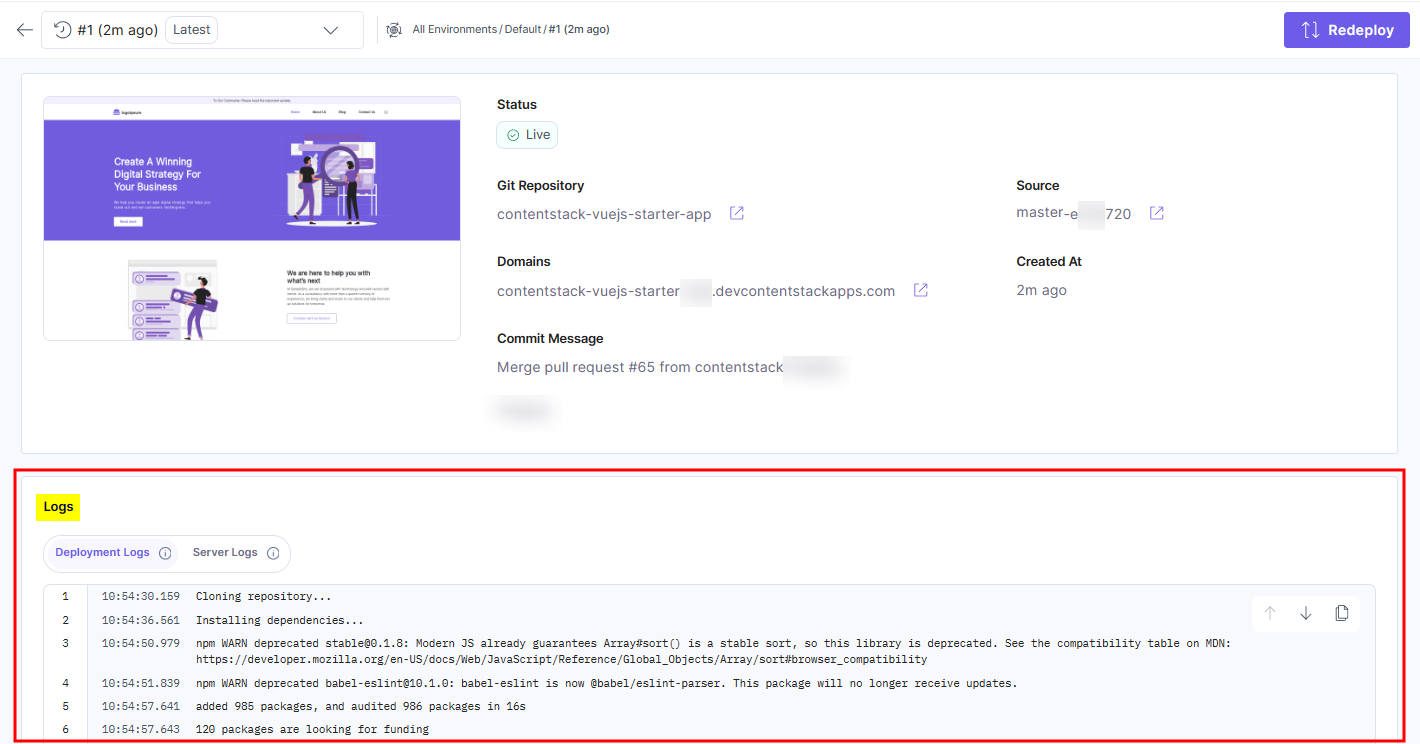
Upon successful deployment, you will see the following screen. You can preview the deployed website by clicking the icon next to the URL in the Domains section:
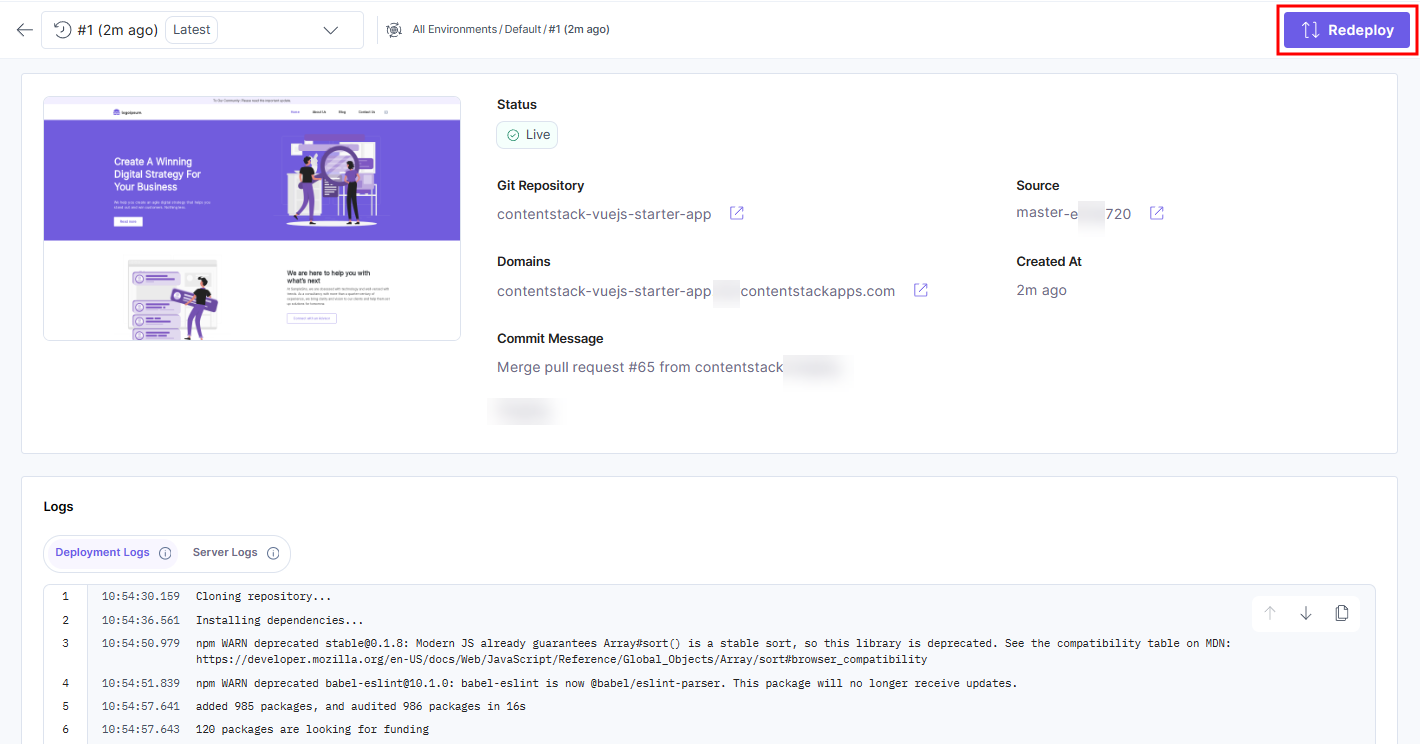
If you want to deploy the changes from any other commits, you can click the Redeploy button and choose the required commit.
Note: The log details of the current deployment can be found under the Logs section.
More articles in "Launch Overview"
