

.svg?format=pjpg&auto=webp)
.svg?format=pjpg&auto=webp)
.png?format=pjpg&auto=webp)


.png?format=pjpg&auto=webp)
App Hosting in Developer Hub
UI Locations are integral to the customization of the Contentstack that allow you to enhance the Contentstack user interface with custom-built elements, providing an enriched user experience. They refer to specific places within the Contentstack dashboard where custom UI components can be embedded. To ensure these components operate seamlessly, their corresponding UI code must be hosted properly.
The App Hosting feature in Contentstack enables you to host your app via Contentstack’s Launch platform or an external web hosting provider.
Contentstack Developer Hub offers two hosting options to cater to your specific needs:
- Custom Hosting
- Hosting with Launch
Let’s take a look at the benefits, scenarios and procedure of using the two App Hosting options for hosting the user interface code associated with UI Locations within the Contentstack Developer Hub.
Custom Hosting
A self-managed solution if you require hosting on your own servers or need specific configurations.
Why should you choose Custom Hosting?
- Complete control over the hosting environment.
- Organizations with specific hosting policies and resources.
Scenarios Custom Hosting is ideal for
- Complex UI Locations that need specialized server setups.
- Custom implementations with dedicated infrastructure.
- Organizations with specific hosting policies and resources.
Steps for Custom Hosting
Log in to your Contentstack account, create an app in the Developer Hub and follow the steps below to host your app:
- Navigate to the app you created. In the left navigation panel, you will find the icon for Developer Hub. Click the icon to navigate to Developer Hub.
- You will be directed to the app dashboard where you will see all apps created so far. Select an app to get started.
- In the left navigation panel, click the Hosting tab.
- In the Hosting Type, select Custom Hosting.
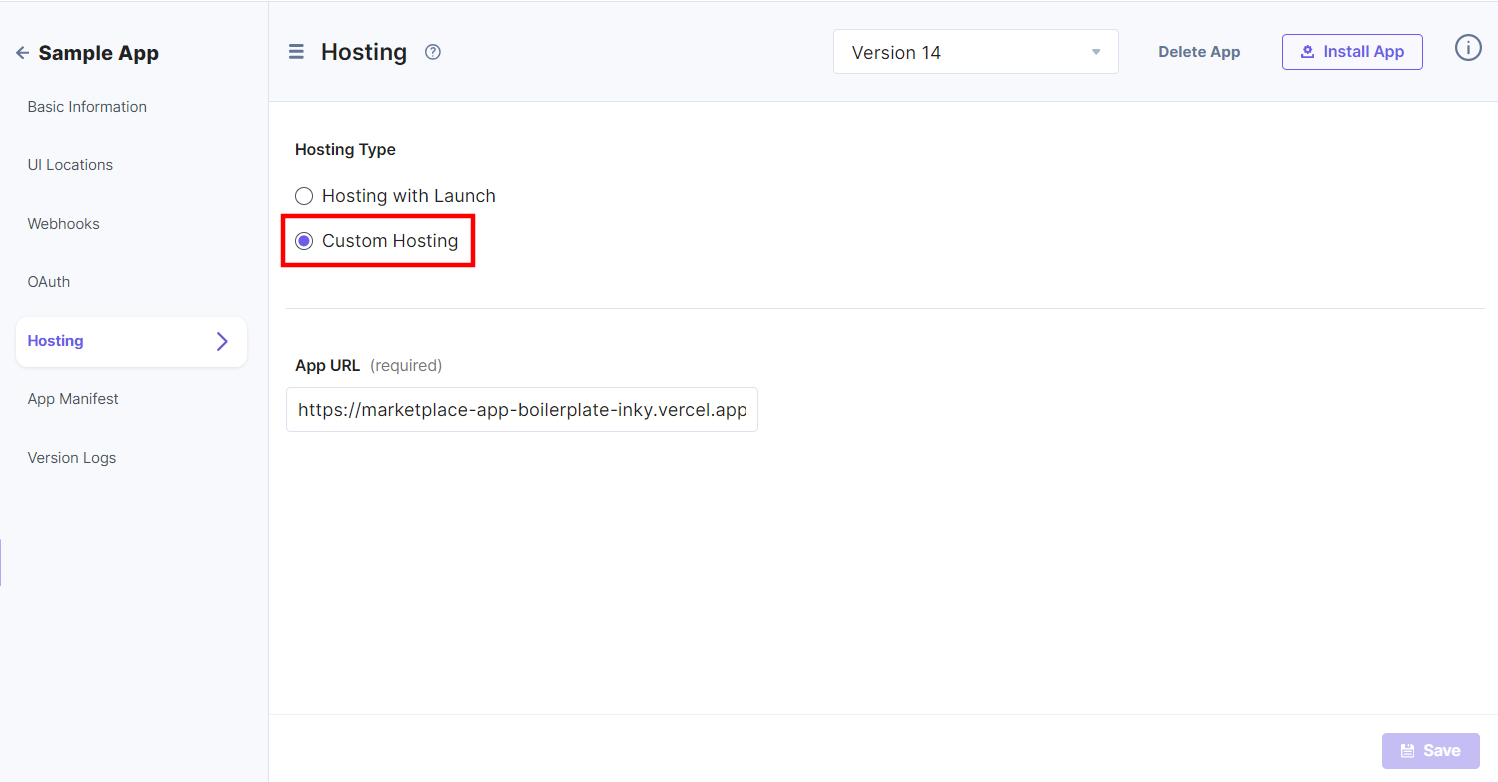
- In the Custom Hosting option, enter the App URL where your app is hosted.
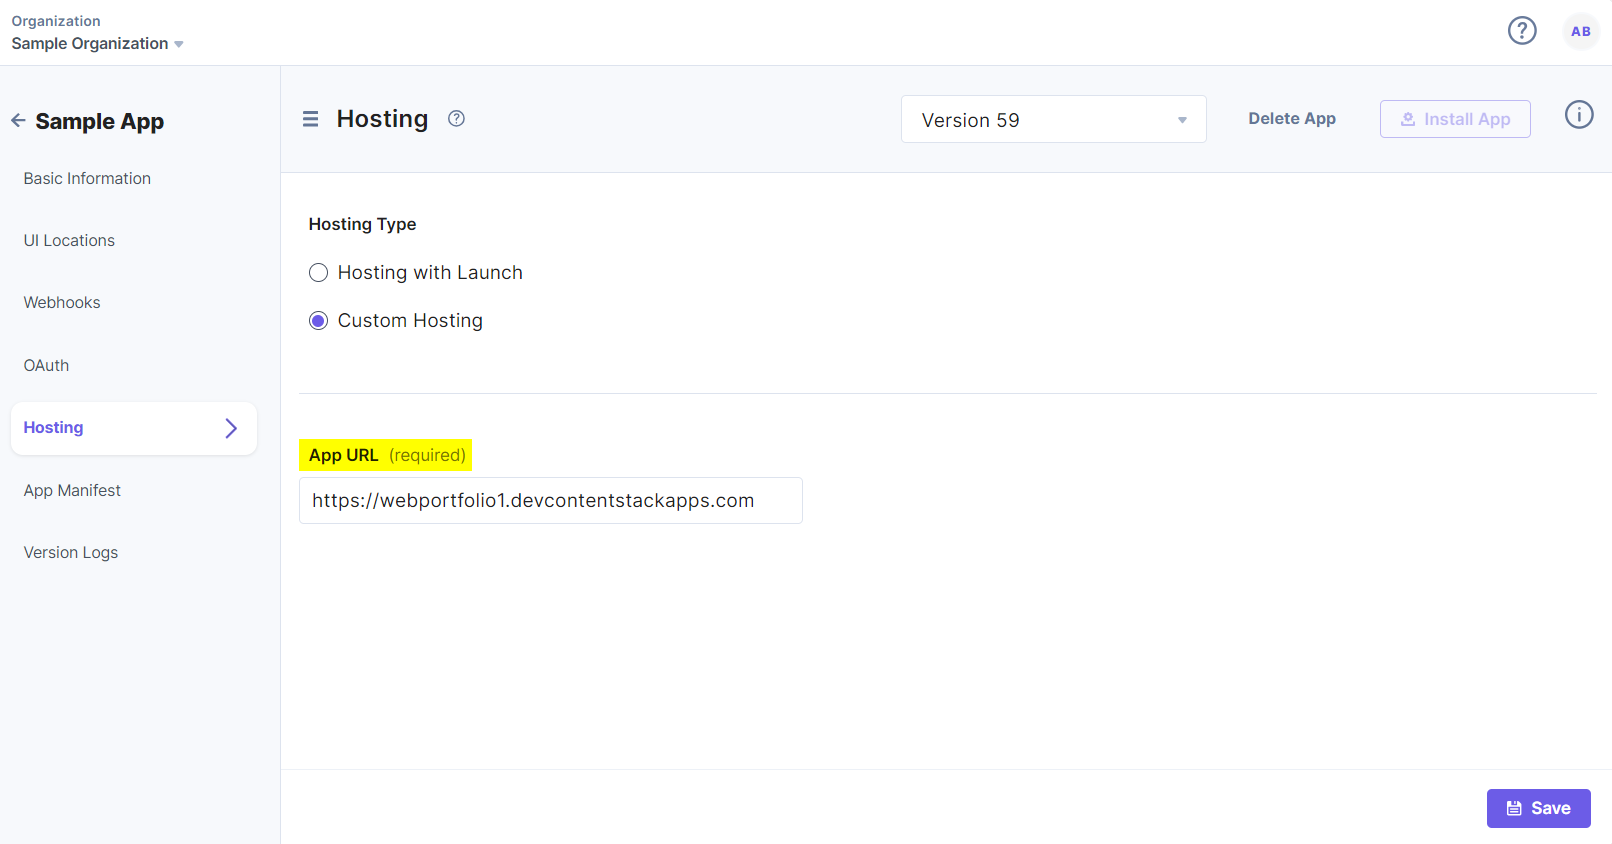
- Click the Save button.
Hosting with Launch
Managed hosting solution recommended for those who wish to leverage Contentstack’s infrastructure for ease of deployment.
Why should you choose Hosting with Launch?
- Quick and easy setup, allowing for immediate deployment.
- A managed service that reduces the overhead of self-hosting.
- Automatic scaling and security provided by Contentstack.
Scenarios Hosting with Launch is ideal for
- Standard UI Locations that do not require complex backend logic.
- Developers who prioritize ease of maintenance and support.
- Quick integration within the Contentstack ecosystem.
Steps for Hosting with Launch
- Navigate to the app you created. In the left navigation panel, you will find the icon for Developer Hub. Click the icon to navigate to Developer Hub.
- You will be directed to the app dashboard where you will see all apps created so far. Select an app to get started.
- In the left navigation panel, click the Hosting tab.
- In the Hosting Type, select Hosting with Launch.
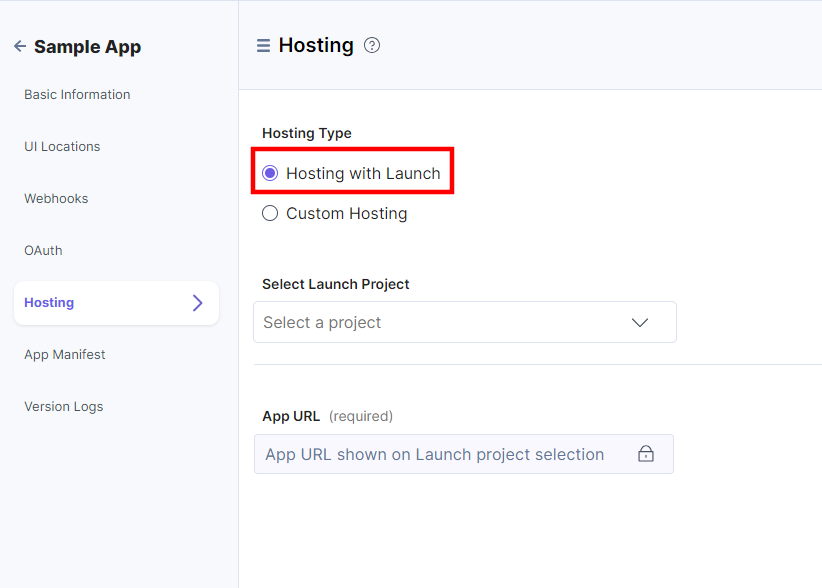
- Select a Launch Project from the dropdown. This will fetch all the projects deployed in your Launch platform.
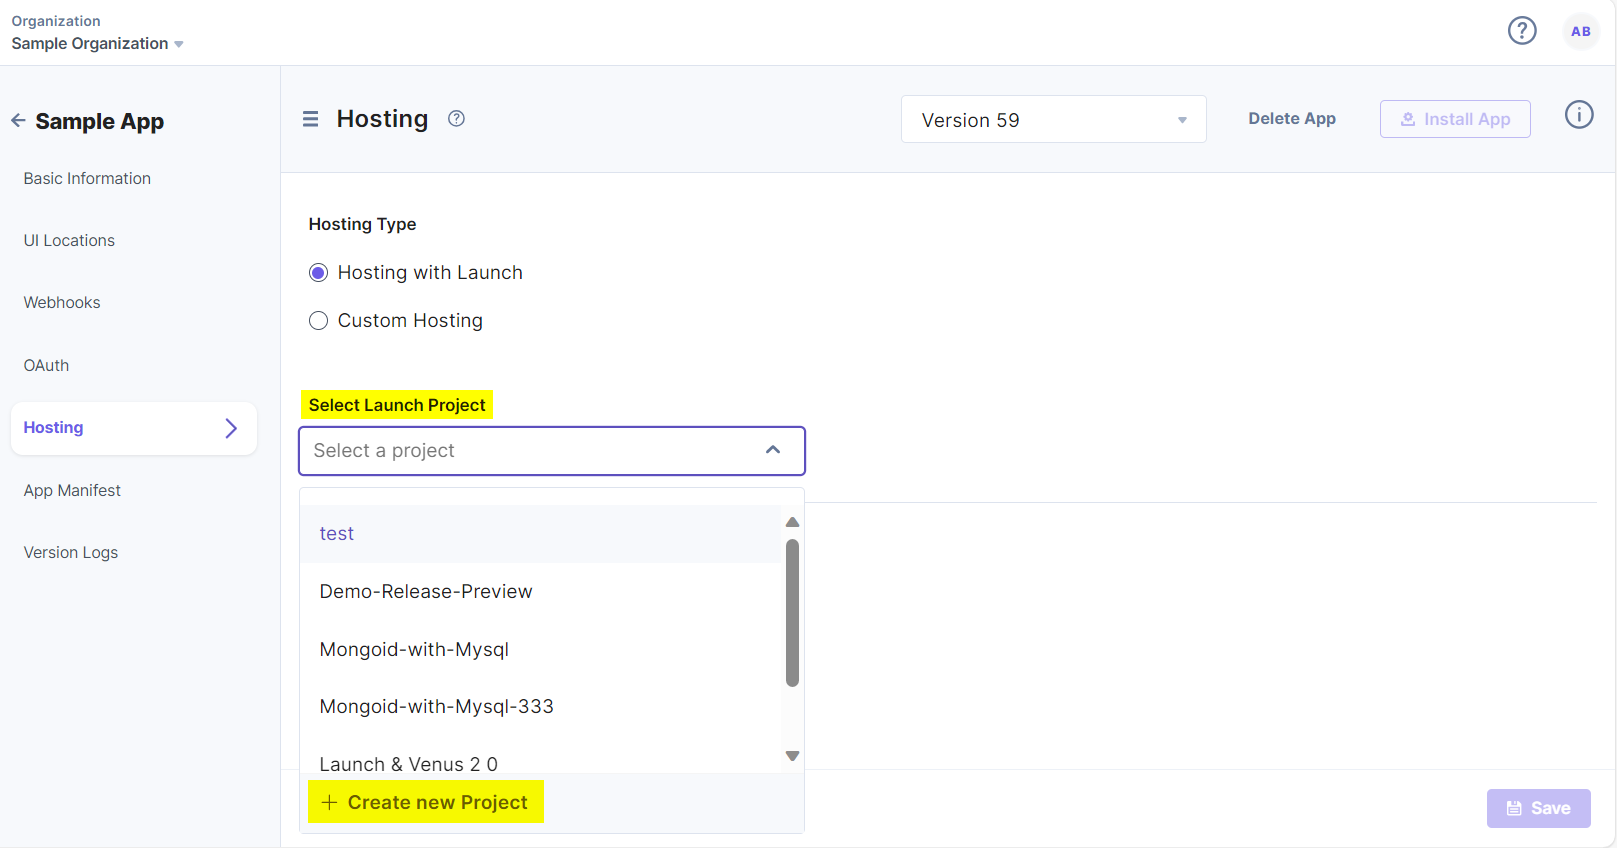
To create a new project in Launch, follow the steps below:
- Click + Create a New Project.
- You will see a pop-up to fetch the project from GitHub or upload a zip file. Click Next to proceed further.
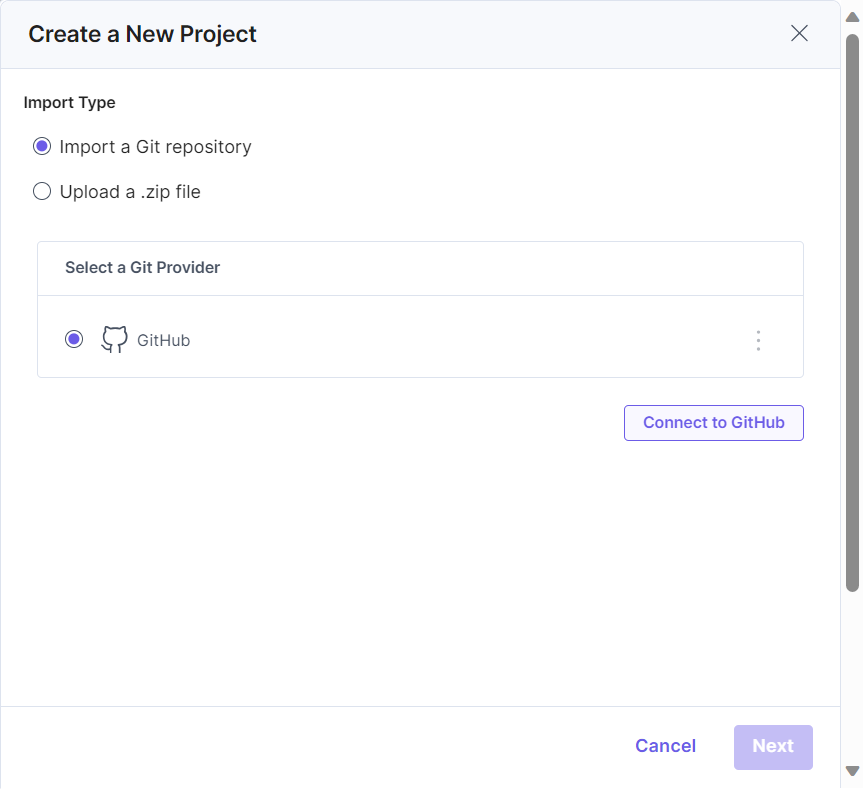
Additional Resource: Launch allows you to create a project by importing the website code from GitHub or by uploading a zip file. Please refer to the Create a Project using GitHub and Create a Project using File Upload documentation for detailed step by step.
Once the project is successfully selected or created, you will see Status for the project. Live status shows successful deployment of the project whereas Failed status denotes that the deployment failed.
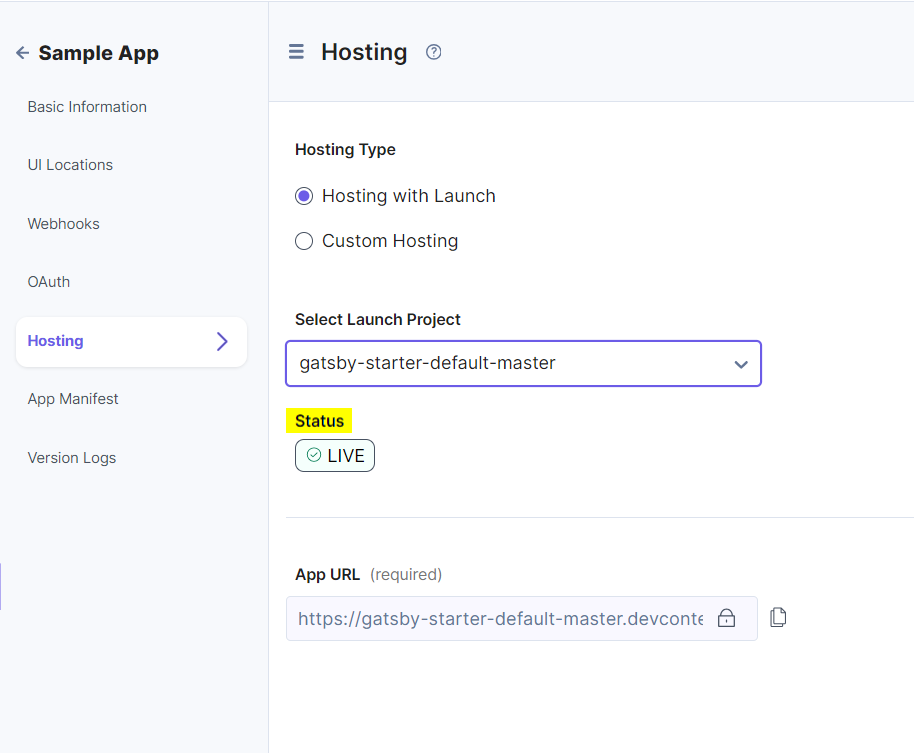
- Click the Save button.
Disconnecting Launch Project and Opening in Launch
After saving, you will see a three dots icon besides the Select Launch Project dropdown. You can Disconnect Launch Project or Open in Launch.
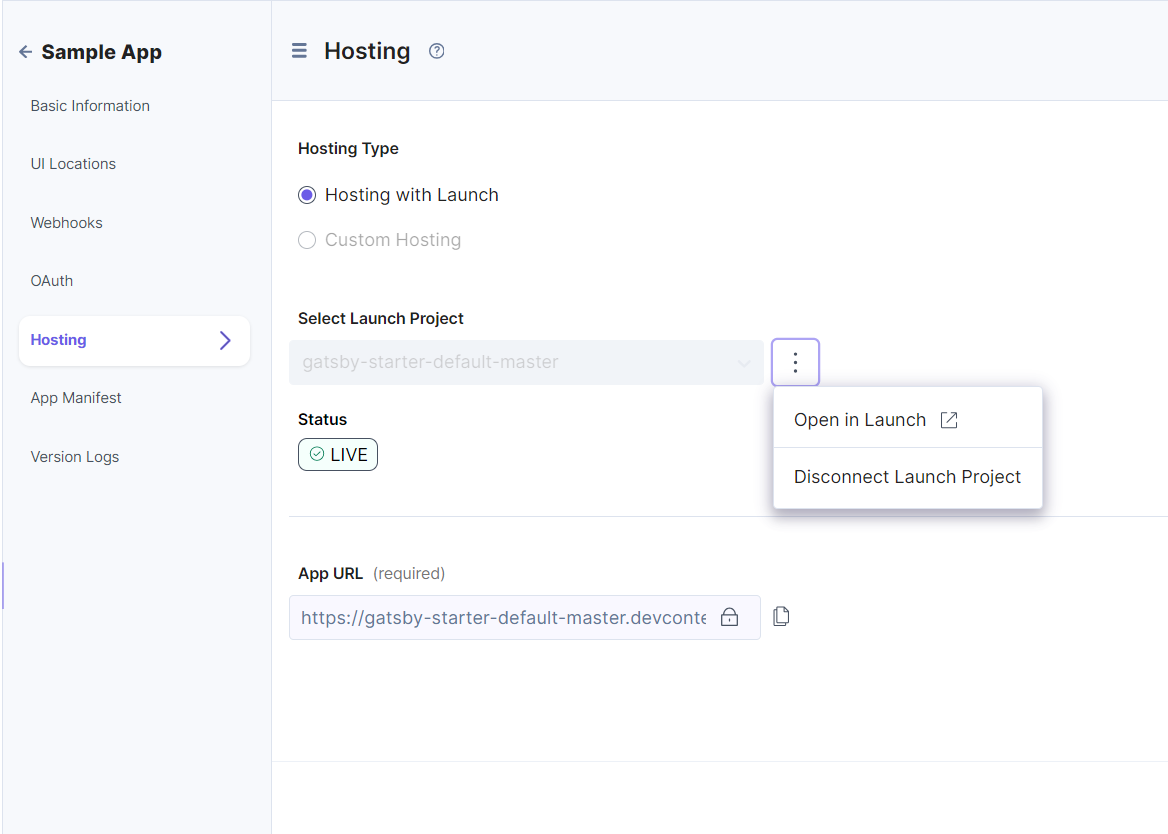
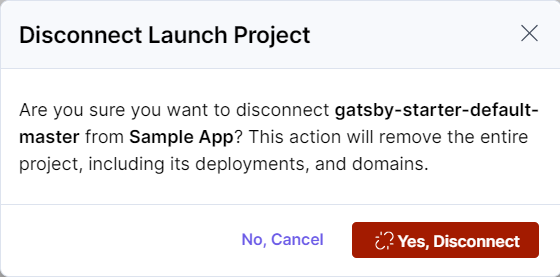
- To disconnect, click the three dots icon besides the Select Launch Project dropdown and then click the Disconnect Launch Project.
- In the pop-up. Click Yes, Disconnect to disconnect the project.
- To open a project in launch, click Open in Launch. You are redirected to the Launch projects landing page as shown below:

With App Hosting, Contentstack empowers developers with the flexibility to host UI code for UI Locations in a manner that best suits their project requirements. Select the hosting option that best facilitates the deployment and optimal functioning of your custom UI components within the Contentstack platform.
More articles in "Working with Developer Hub"
