


.jpg?format=pjpg&auto=webp)


Perform Indexing Using Elasticsearch and Contentstack Webhooks
Elasticsearch is a powerful, distributed, full-text search engine for all types of data. This includes, geospatial, numerical, structured, and other data types. Organizations use Elasticsearch for storing, analyzing, and searching huge volumes of data swiftly.
In this guide, we will discuss the steps required to create an index using Elasticsearch and Contentstack.
Additional resource: We also have working examples that can help you implement other search platforms with Contentstack. Read through the Working with Search Platforms section on our doc site for more information.
Prerequisites
- Basic understanding of Node.js and Elasticsearch
- Elasticsearch installed on your system
- Contentstack Account
- Java 8 or any latest version of OpenJDK installed on your computer
- Basic knowledge of working with stacks, content types, entries, and webhooks
- ngrok for creating secured tunnels
- API collaboration and development platform such as Postman
Steps for Execution
- Install and set up Elasticsearch
- Set up the essentials in Contentstack
- Download example code and run the instance
- Set up a webhook in Contentstack
- Try out the steps
Let's get started!
Note: Before proceeding with the steps, it is mandatory that you have installed Java or any latest version of OpenJDK on your machine.
Install and Set up Elasticsearch
The first step is to install the Elasticsearch app on your system. If you haven't already installed it, follow the steps given below before moving further with the guide.
- Visit the Elasticsearch download page and based on your operating system, install the latest version of Elasticsearch.
For this guide, we have installed it on Windows using the MSI installer package as shown below. You can follow other methods of installation by following the instructions given on the page.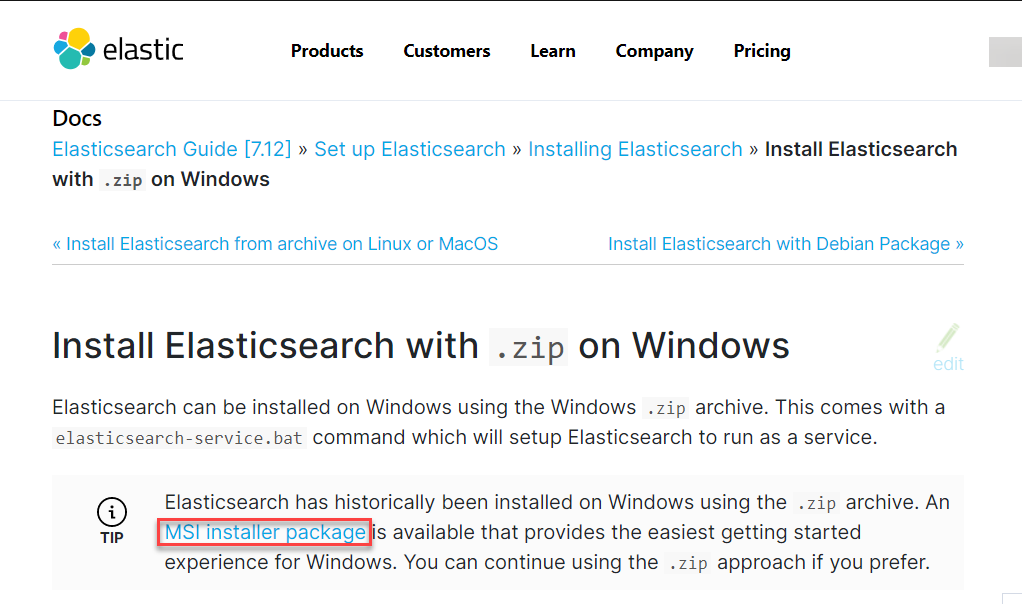
- You'll be directed to the Install Elasticsearch with Windows MSI Installer page. Scroll down to the Download the .msi package section and click on the link provided.
- The package will start the installation process. Follow the onscreen instruction and Elasticsearch will be installed on your system.
- Once Elasticsearch is installed, you need to install OpenJDK on your machine. To do this, visit the OpenJDK page and install the latest version depending on your operating system.
- After installing Java & Elasticsearch, your local Elasticsearch instance is ready to run. It is possible that the Elasticsearch service is already running as you installed it.
However, to confirm if the service is running on Windows, click on the Windows key, type services, and hit Enter. You'll see the services that are currently running. Search for Elasticsearch and if the Status is Running, it indicates the Elasticsearch instance is already running on your system.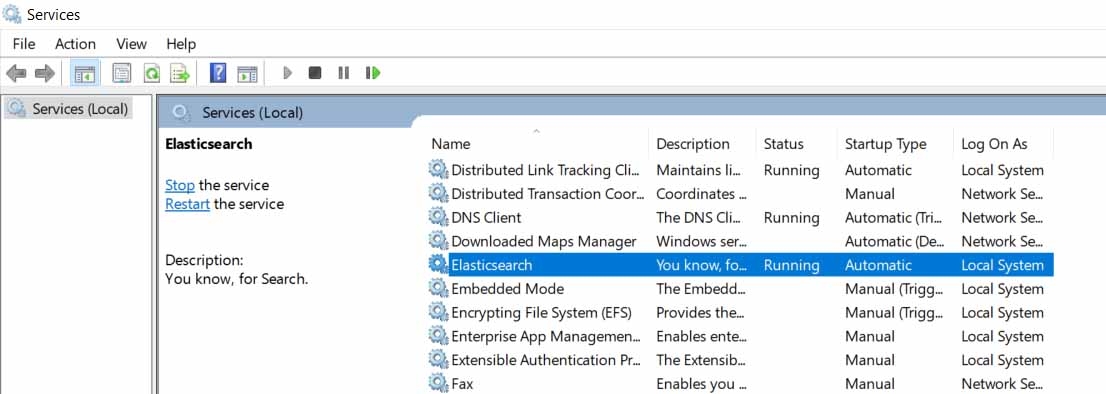
If the Status shows Stopped, right click on it and select Start. After successfully starting the service, open your browser and hit the URL: http://localhost:9200/. You should see the following screen: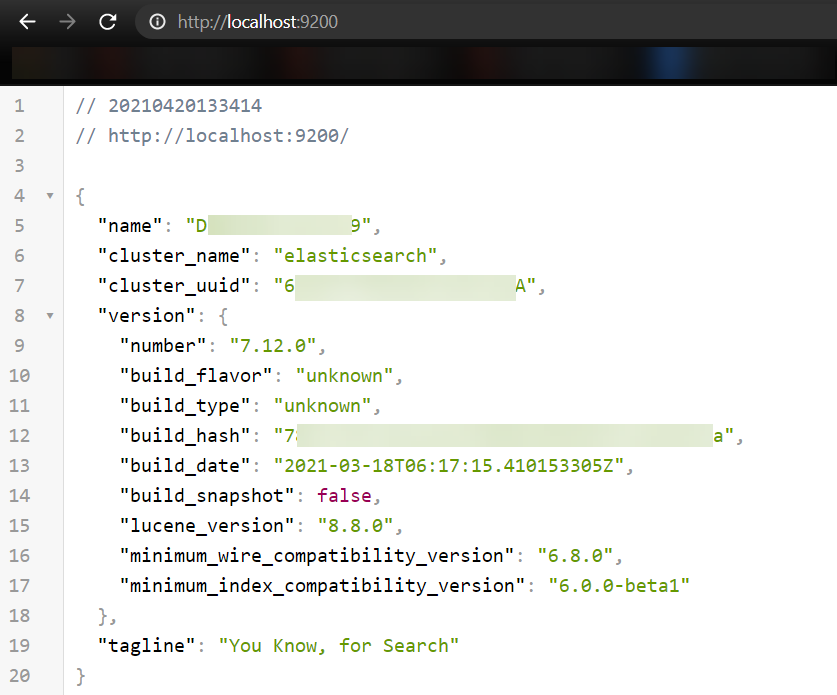
This indicates the Elasticsearch service is running and you can now perform indexing.Additional resource: You can also refer to Elasticsearch docs for more information about this process.
- If you are using Linux, you can try the following command to start the Elasticsearch instance:
sudo service elasticsearch start
- For MacOS, you can run the below command after moving into the folder where you have downloaded Elasticsearch. For example, if you've downloaded Elasticsearch in Downloads, use the following command:
cd ~Downloads/elasticsearch-1.1.0 - Now move into the Elasticsearch bin subfolder. Then, start Elasticsearch, for example:
cd bin $ ./elasticsearch
Note: MacOS users can visit the Elasticsearch installation page and follow the instructions to install Elasticsearch on their machines.
With these steps, we have installed and set up Elasticsearch on our system. Let's now set up the essentials in Contentstack.
- Visit the Elasticsearch download page and based on your operating system, install the latest version of Elasticsearch.
Set up the Essentials in Contentstack
For this exercise, you need to create a content type in your stack as required. It is recommended to create a new content type to try this set up.
You can also create a new environment in your stack where you will publish the entries created in the new created content type. For this example, we have created a new environment named "Development" and we will publish our entry on it.
Once the content type is created, create a couple of entries inside it. Do not publish them yet as we still need to perform steps before the set up completes (discussed later in the guide).
Download Example Code and Run the Instance
To understand the example better, we have created a sample code for this exercise.
Note: Ensure that the Elasticsearch service instance is running throughout this process.
Download the code from our GitHub repository and perform the following steps:
- Move inside the project root directory (you just downloaded) and install the required dependency by using the following command:
npm install
- Now run the sample app by using the following command:
npm start
The instance is now operational on localhost 3000. This will establish a connection between Elasticsearch and our application. On the first run, if there’s no index created with the name contentstack within Elasticsearch, it will be created and then the mapping properties get added.
By mapping, we are basically telling Elasticsearch that this is the schema of our documents that will be stored in the Elasticsearch index (contentstack). This step will be done by the app itself.
- Move inside the project root directory (you just downloaded) and install the required dependency by using the following command:
Set up a Webhook in Contentstack
We need to set up a webhook to notify Elasticsearch when content is updated in Contentstack so that the Elasticsearch index can be updated based on the event that occurred.
To do this, you first need to install ngrok. This is because the app is running on a localhost and to let our webhook initiate the trigger, it requires a public URL. So once you have installed ngrok, open it, and then run the following command:
The app is running on port 3000. It will provide you with two URLs. Make note of the "https" URL as highlighted below:ngrok http 3000
The highlighted URL will be used while setting up the webhook. For this exercise, we have already created a webhook (available as part of the downloaded code with the name "webhook") which you can import to your stack.So log in to your Contentstack account and follow the steps given below:
- Navigate to the Settings gear icon on the left navigation panel and click on Webhooks.
- On the Webhooks page, click on the "Import" icon below the + New Webhook button.
- On the Import Webhook modal, click on the Choose a file button and move to the folder that you downloaded earlier. Select the file named webhook and click on Import.
- The webhook will be imported to your stack with the name Index in Elasticsearch. Open it and update the URL to notify field by adding the ngrok URL that we generated above. Ensure to append "/api/auto" at the end of the URL, for example, https://3f1bddfb9df1.ngrok.io/api/auto.
- Scroll down to the When section and note the conditions that's added:
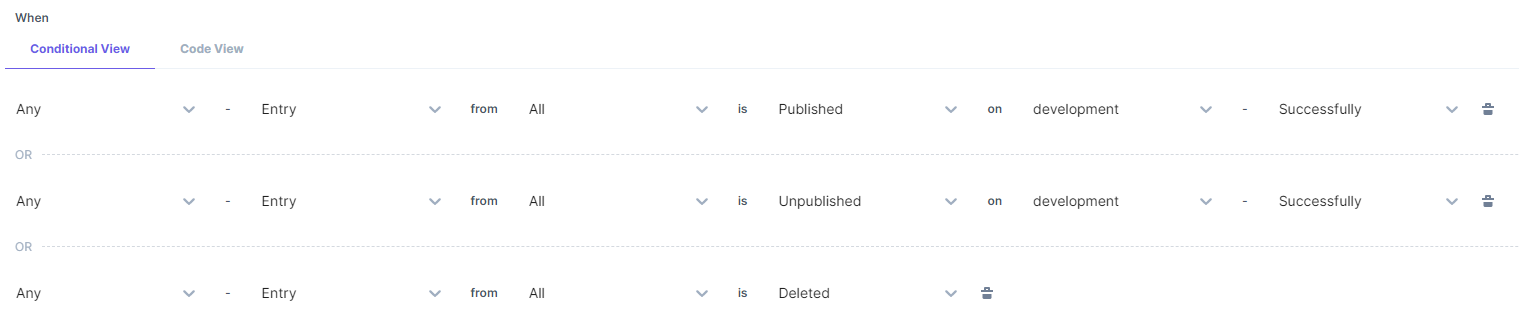
This means that if any entry is published, unpublished, or deleted on the development environment, the webhook will be triggered. - Ensure that the Enable Webhook option is checked and click on the Save button.
With these steps, we have set up the webhook. Elasticsearch is now ready to receive notifications when any content is updated in Contentstack based on the conditions we specified above.
Try out the Steps
We now have the set up ready and we can test it out. So follow the steps given below:
- Go to the content type that you created in your stack in step 2 and publish the entries that you added in it on the development environment.
- The indexing will be performed in the background through the webhook triggers.
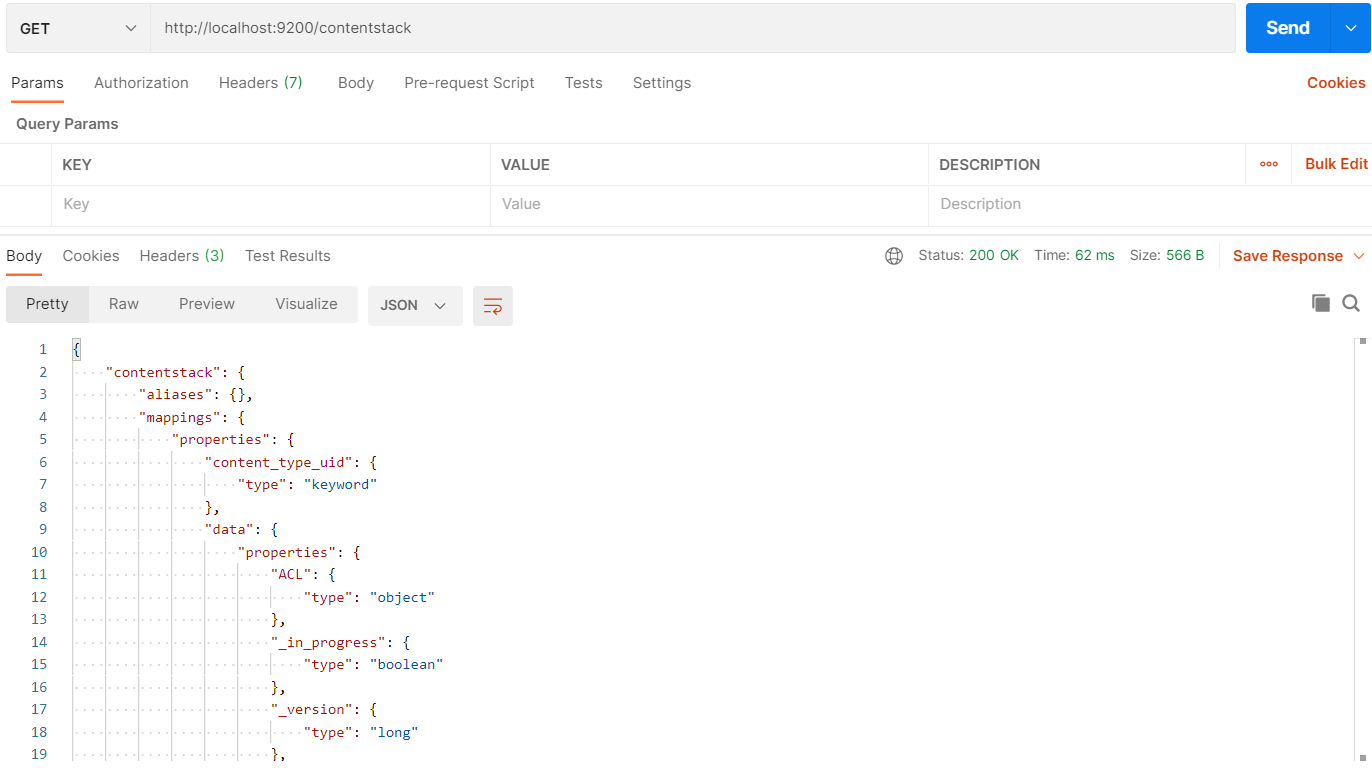
- To check the indexing, open Postman (or any other API platform that you use) and make a GET request on the following point:
http://localhost:9200/contentstack/_search - Click on Send to fetch the response. You’ll see a JSON response for the indexed entries of Contentstack:
Now to add search functionality to your Contentstack-powered website, you can use the http://localhost:9200/contentstack/_search?q=*add-your-search-query-here* endpoint in your browser.
Alternatively, you can also make a Get request on the same endpoint in Postman to query data from Elasticsearch index. So if you publish an entry it will get added in the contentstack index as a document. If you unpublish or delete that entry, the indexed entry/document will get removed from the contentstack index.
Additional resources: If you want to learn how to implement Elasticsearch, you can follow the steps mentioned in the Add Elasticsearch for your Contentstack-powered website guide. If you want to implement other search providers for your Contentstack-powered websites, refer to this section.
More articles
