


.jpg?format=pjpg&auto=webp)


Setup Production and Non-Production Environment
When apps are being developed and released, software developers use environments to create stages. As per industry standards for environments, most of the processes begin with development and end with production.
Launch allows you to create such environments.
This step-by-step guide will walk you through the process of creating both production and non-production environments.
Prerequisites
- Contentstack account
- Access to Launch for your organization
Create a Production Environment
Follow the steps given below to convert the Default environment of a project to a production environment.
- Log in to your Contentstack account and select the Launch icon from the left navigation panel.
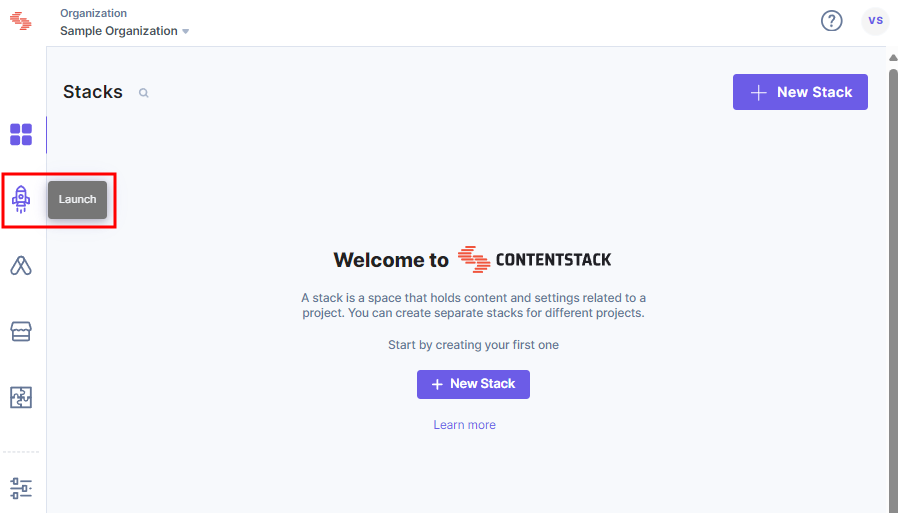
- On the Launch landing page, open the project for which you want to change the Default environment to production environment.
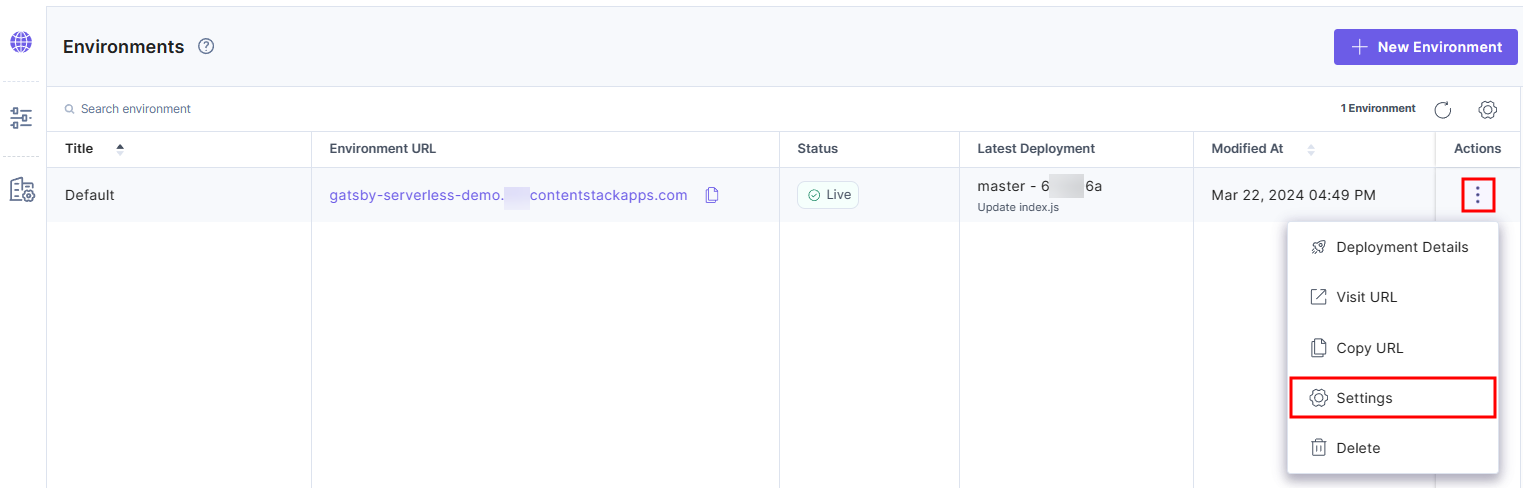
- On the Environments screen, click the ellipses under Actions, next to Default, and then click Settings.
- In Environments under Settings, click General and enter Production as the Environment Name.

- Click the Save Environment Details button.
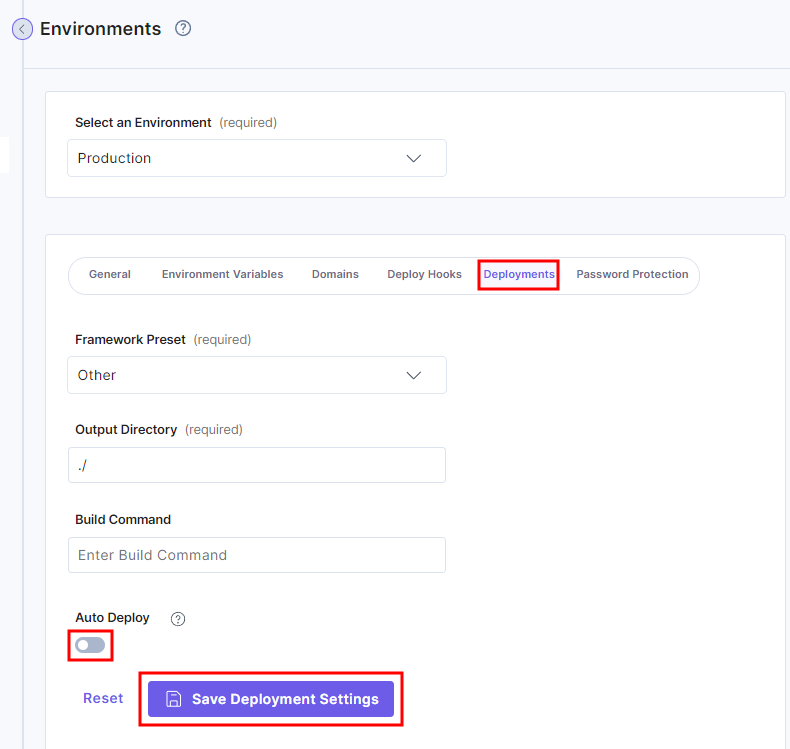
- Next, click Deployments.
- Click the Auto Deploy toggle to disable it, and then click the Save Deployment Settings button.
Note: For Git repository based projects, you can prevent the ‘Production’ environment from automatically deploying any new commits that you push.
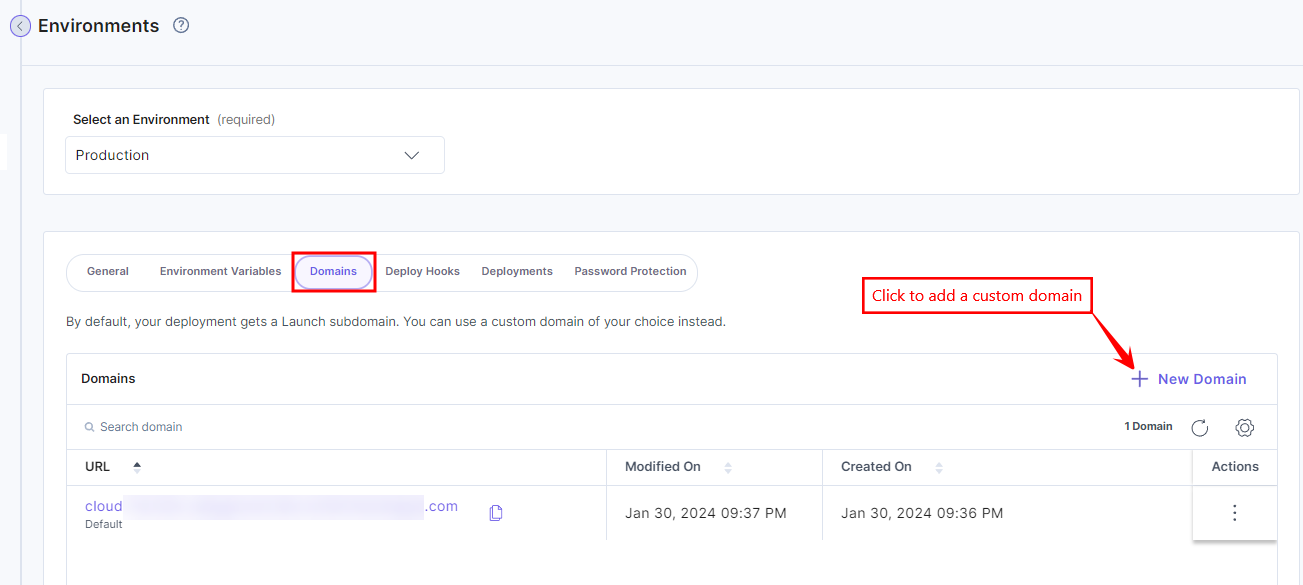
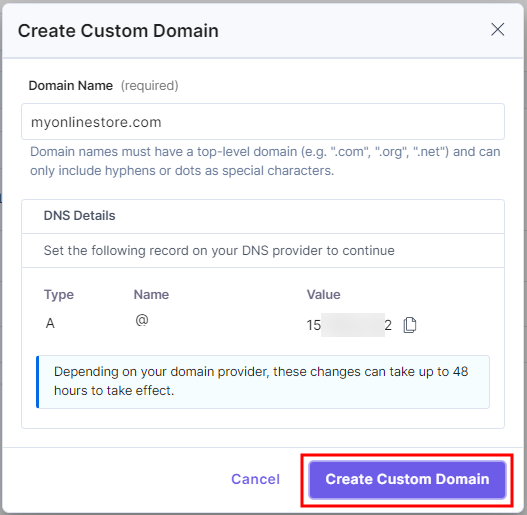
- You can add a custom domain for your projects. To do this, click Domains and then the + New Domain button, to add a custom domain.
- Click the Environments icon in the left panel and then click the production environment you created to view the Deployments page.
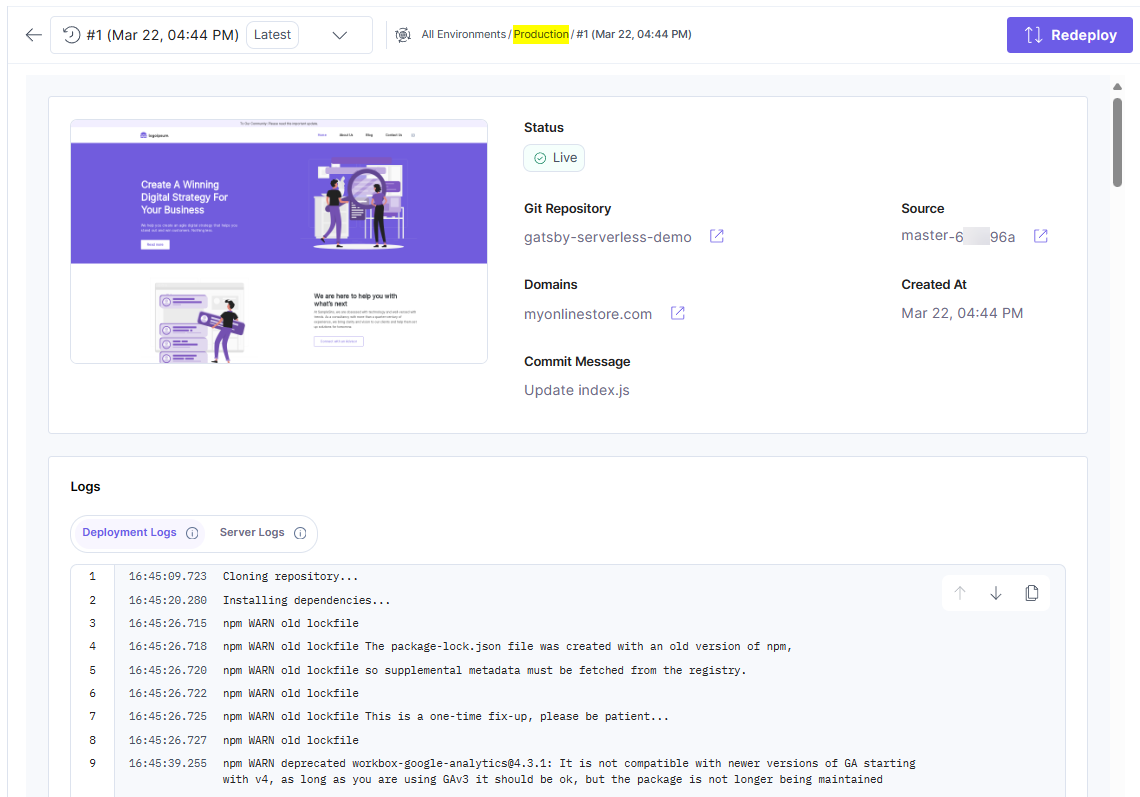
With these steps, you have successfully set up a production environment for your projects.
Create a Non-Production Environment
Follow the steps given below to create a non-production environment.
- Follow the steps provided in the Create an Environment section in this guide.
Note: Make sure to add the Environment Name as per the non-production environment you want to create. For example, if you want to create a development environment, add the Environment Name as Development.
- Next, in Environments under Settings, click Deployments.
- Click the Auto Deploy toggle to enable it, and then click the Save Deployment Settings button.
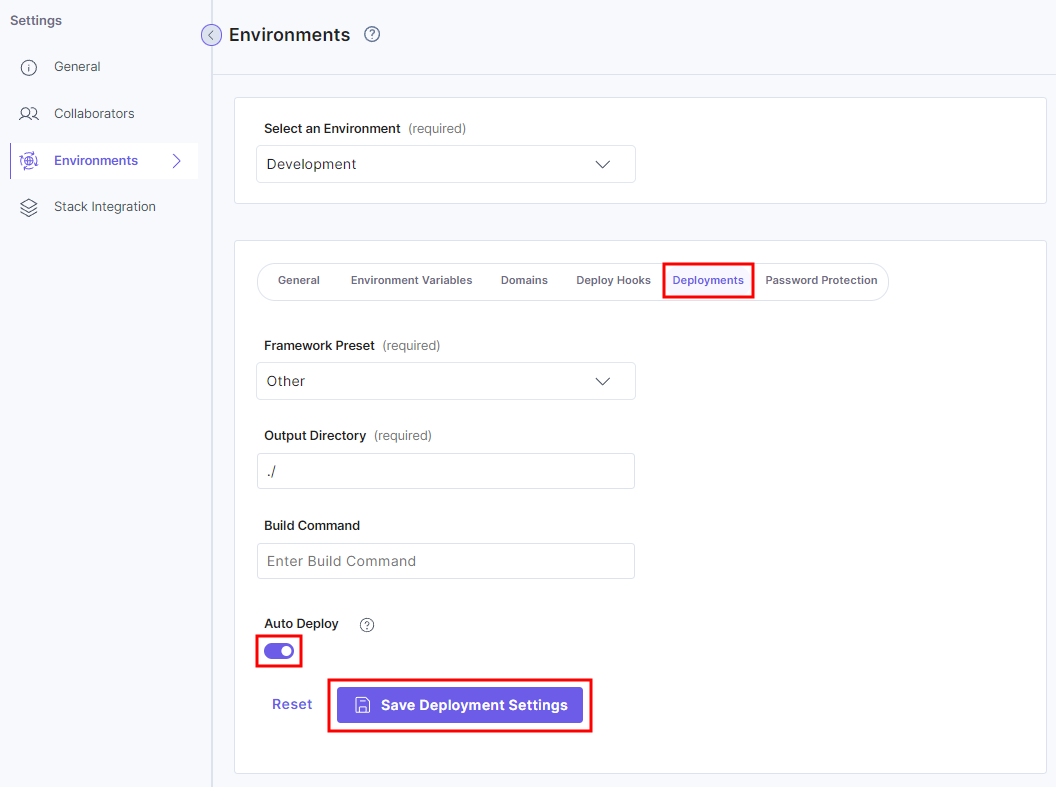
Note: Skip this step if the Auto Deploy toggle is already enabled.
You have successfully set up a non-production environment for your projects.
More articles in "Launch How to Guides"
